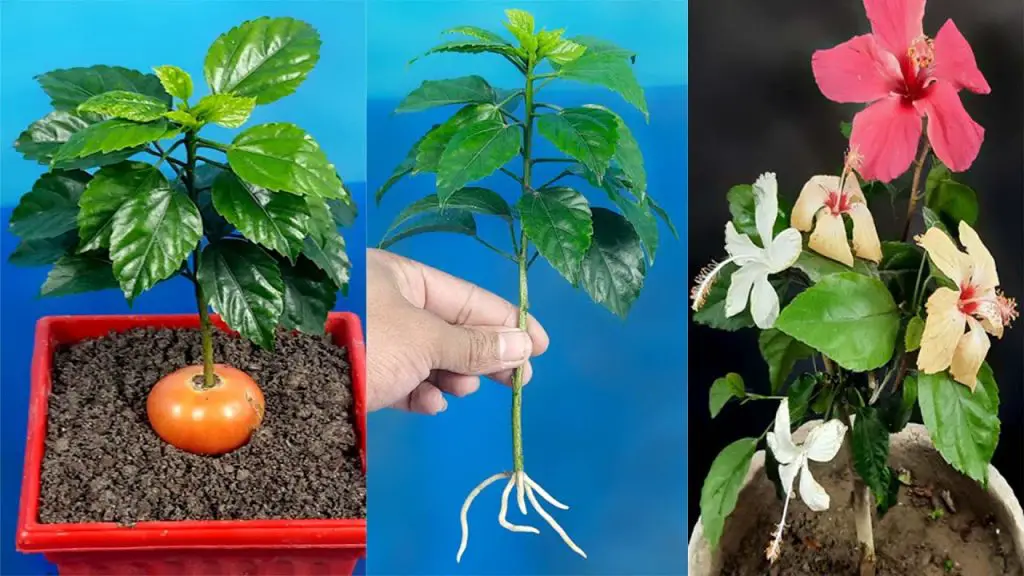
Hibiscus plants are admired for their vibrant, tropical flowers and lush foliage, making them a popular choice for gardens and indoor decor. While growing hibiscus from seeds can be a lengthy and uncertain process, propagating hibiscus using cuttings is a much faster and more reliable way to produce new plants. This method allows you to clone your favorite hibiscus varieties and grow them with ease, whether you’re looking to expand your garden or share them with friends and family. In this article, we will guide you through the step-by-step process of growing a hibiscus plant from cuttings.
Why Propagate Hibiscus from Cuttings?
- Fast Results: Cuttings root quickly, often within a few weeks, compared to the longer waiting time when starting from seed.
- Maintain Characteristics: When you propagate hibiscus by cuttings, you’re ensuring that the new plant will have the same color, flower shape, and growth habits as the parent plant.
- No Pollination Required: Unlike growing hibiscus from seeds, cuttings do not require pollination, making them a more straightforward method.
How to Grow Hibiscus Plant from Cuttings
1. Choose the Right Cutting
- The first step in propagating hibiscus is to select a healthy parent plant. Choose a hibiscus that is free from pests or diseases, with strong stems and healthy leaves.
- Cuttings should be taken from semi-hardwood stems (not too young or too old) because they root more easily. Aim for a stem that is about 4-6 inches long.
2. Take the Cutting
- Use a sharp, clean knife or pruning shears to make a clean cut just below a node (where a leaf joins the stem). This ensures that the cutting has a place to form roots.
- Remove any flowers or buds from the cutting, as they can divert energy from root development. Leave only a few leaves at the top of the cutting.
3. Prepare the Cutting
- Trim the leaves: Cut the larger leaves in half to reduce water loss. This helps the cutting focus on developing roots rather than supporting excessive foliage.
- Optional: Dip the cutting in rooting hormone: While hibiscus cuttings can root without rooting hormone, dipping the cutting’s cut end in a rooting hormone powder or gel can improve root development and increase the chances of success.
4. Plant the Cutting
- Fill a small pot or container with well-draining soil. A mix of potting soil and perlite or sand works well for hibiscus cuttings, as it provides the drainage they need.
- Insert the cutting into the soil, ensuring that the cut end is buried about 2-3 inches deep.
- Gently firm the soil around the cutting to provide support.
5. Provide Proper Growing Conditions
- Watering: After planting the cutting, water it lightly. The soil should be kept consistently moist but not soggy, as too much water can lead to root rot.
- Humidity: Hibiscus cuttings require high humidity to encourage root development. You can create a humid environment by placing a clear plastic bag or a plastic dome over the pot. Make sure to leave some space for airflow to prevent mold growth.
- Light: Place the pot in a bright, indirect sunlight location. Avoid direct sunlight, as it can scorch the cutting. A south-facing window or under a grow light works well.
- Temperature: Keep the temperature around 70°F to 80°F (21°C to 27°C), as hibiscus cuttings root best in warm conditions.
6. Monitor the Cutting
- Over the next few weeks, check the cutting regularly for signs of root development. Gently tug on the cutting to see if there’s resistance, which indicates that roots are forming.
- Continue to keep the soil moist, but not soaking wet, and ensure the cutting stays in a humid environment.
7. Transplanting the Rooted Cutting
- Once the cutting has developed a healthy root system (usually in about 4-6 weeks), it’s ready to be transplanted into a larger pot or directly into your garden.
- Carefully remove the cutting from the pot and transplant it into fresh, well-draining soil. If planting outdoors, choose a location with full sun and well-draining soil.
- Water the newly transplanted hibiscus regularly, but allow the soil to dry slightly between waterings to prevent root rot.
Tips for Successful Hibiscus Propagation
- Be Patient: Hibiscus cuttings take time to root. While some may root quickly, others may take longer, so be patient during the process.
- Maintain Humidity: Hibiscus cuttings are very sensitive to dry air, so make sure to keep the humidity levels high. You can use a humidifier or place a misting bottle near the plant.
- Avoid Overwatering: Excessive moisture can lead to rot. It’s better to let the soil dry out slightly between waterings than to keep it too wet.
- Use Clean Tools: Always make sure your cutting tools are clean and sterilized to prevent the spread of disease.
- Consider Seasonal Timing: It’s best to propagate hibiscus during spring or summer, when the plant is actively growing and rooting is more likely to be successful.
Conclusion
Propagating hibiscus through cuttings is a simple and effective way to grow new plants and expand your collection. By following these straightforward steps and providing the right care, you can easily create healthy hibiscus plants that will reward you with stunning flowers. Whether you’re a beginner or an experienced gardener, hibiscus propagation is a fun and satisfying project that can bring beauty and color to your garden or home all year round.