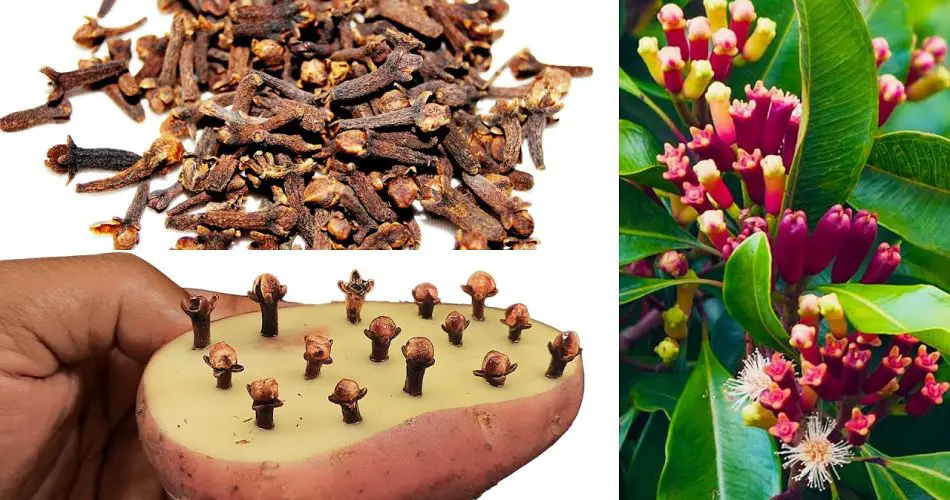
The clove plant (Syzygium aromaticum) is a tropical evergreen tree that produces the aromatic spices we use in cooking, perfumes, and even medicinal remedies. Known for its rich, spicy aroma and antioxidant properties, growing cloves at home can be a rewarding and interesting gardening project. If you’re wondering how to grow clove plants from seeds, this guide will walk you through the steps to cultivate your own spice-rich tree right at home.
Why Grow Clove Plants at Home?
Growing clove plants at home has numerous benefits:
- Fresh Cloves: Growing your own cloves ensures that you have a fresh, aromatic supply whenever you need it.
- Medicinal Benefits: Cloves are known for their health benefits, including their anti-inflammatory, antioxidant, and pain-relieving properties.
- Unique Gardening Experience: As a tropical plant, cloves are relatively unique and interesting to grow, especially if you’re in a warm climate.
How to Grow Clove Plants from Seed
Growing a clove tree from seed is a relatively simple but long-term process. Here are the steps to successfully start your own clove plant from seed:
1. Obtain Fresh Clove Seeds
- The first step is to get your hands on fresh clove seeds. These are available from specialty gardening stores or online. Ensure that the seeds are fresh, as old seeds might not germinate.
- You can also use dried cloves from a store, but the germination rate might be lower since the seeds inside may have already lost viability.
2. Prepare the Soil
- Clove plants thrive in well-draining, fertile, and slightly acidic soil. For the best results, use a potting mix that’s rich in organic matter.
- If you’re planting in a container, choose one with drainage holes to prevent waterlogging, which can lead to root rot.
- Ensure the soil pH is between 5.5 to 6.5 for optimal growth.
3. Soak the Seeds
- Before planting, soak your clove seeds in warm water for 24 hours. This helps soften the seed coat and improves germination rates. The soaking also makes it easier for the seeds to absorb moisture and nutrients once planted.
4. Plant the Seeds
- Sow the seeds about 1-2 inches deep into the soil. If you’re using a container, plant 2-3 seeds per pot to account for any non-germinating seeds.
- Space the seeds a few inches apart to give each plant enough room to grow.
- Gently cover the seeds with soil and water them lightly.
5. Provide the Right Environment
- Clove plants need a warm, humid environment to grow well. They thrive in temperatures between 70°F to 90°F (21°C to 32°C).
- Keep your container or seed tray in a location with indirect sunlight. Too much direct sunlight can scorch the seeds or seedlings. You can place it near a sunny window or use a grow light.
- Maintain high humidity around the seeds. You can cover the container with a plastic dome or a clear plastic bag to create a mini greenhouse effect. Make sure there’s enough airflow to prevent mold.
6. Watering and Care
- Water the seeds regularly, but avoid over-watering. The soil should be kept consistently moist, but not soggy.
- After germination, which can take 2-4 weeks, continue watering the young plants with care. Once the seedlings emerge, you can remove the plastic cover.
- Fertilize your seedlings with a balanced, water-soluble fertilizer once a month to encourage strong, healthy growth.
7. Transplanting the Seedlings
- Once the seedlings grow to about 4-6 inches tall and have a few sets of leaves, you can transplant them into larger containers or directly into your garden if you’re in a suitable climate.
- If planting outdoors, make sure the location is in full sun or partial shade with well-drained soil.
- Space the trees at least 10-15 feet apart, as clove trees can grow quite large, up to 30 feet tall in ideal conditions.
8. Ongoing Care and Maintenance
- Prune regularly to encourage bushier growth and remove any dead or damaged stems.
- If your clove plant is growing indoors, be sure to provide enough light and humidity. A humidifier can help if the indoor air is too dry.
- Watering should be consistent, but allow the top of the soil to dry slightly between waterings.
9. Harvesting Cloves
- Clove trees typically take 3-4 years to start producing cloves. However, once they begin flowering, you will notice buds that will eventually develop into cloves.
- Harvest the cloves when they turn from green to a pinkish-brown color. This is when they contain the most aromatic oils.
- After harvesting, you can dry the cloves in a warm, dry place for a few days before storing them in airtight containers.
Growing Clove Plants in Containers vs. Ground
- Containers: Growing clove plants in pots is ideal for small spaces or if you live in an area that doesn’t have a suitable climate for clove trees. Use a large pot and ensure it has proper drainage. You can bring the plant indoors during the winter months to protect it from cold temperatures.
- Ground: If you live in a tropical or subtropical region, planting cloves in the ground is the best option. Cloves require a tropical climate with warm temperatures and high humidity to grow successfully outdoors.
Tips for Success
- Patience is key: Growing clove plants from seed requires patience, as it may take a few years before your tree starts producing cloves.
- Ideal Climate: If you’re growing cloves indoors, make sure your home has a warm temperature and high humidity, or consider using a greenhouse for best results.
- Mulching: Applying mulch around the base of the plant helps retain moisture and keeps the roots cool.
Conclusion
Growing your own clove plant at home from seed is a rewarding and sustainable way to enjoy this aromatic spice. By following these simple steps and providing the right growing conditions, you can have a thriving clove tree in your home or garden in no time. Whether you’re looking to use your freshly harvested cloves in cooking, medicinal remedies, or just enjoy the beauty of the plant, this tropical tree is a great addition to your garden.


