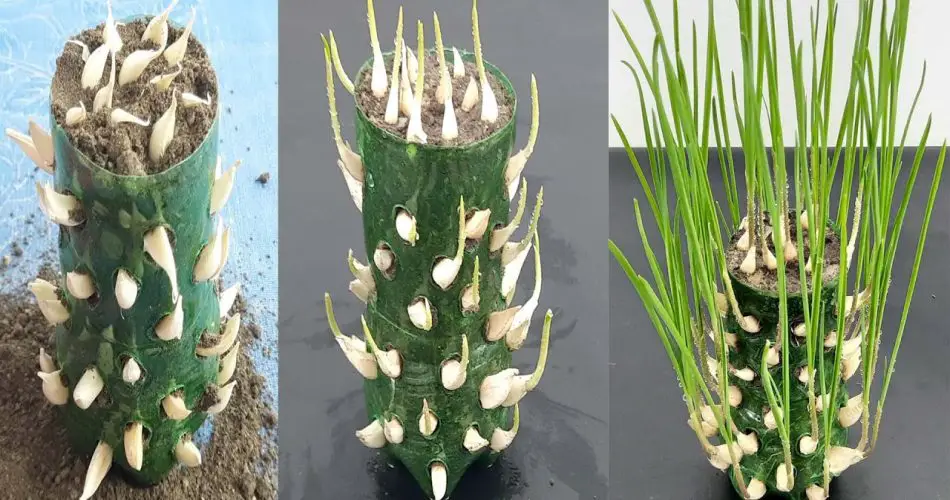
If you’ve always wanted to grow your own garlic but lack the space for a traditional garden, here’s an amazing and innovative idea for you: growing garlic in plastic bottles! Not only is this method perfect for small spaces like balconies, rooftops, or even windowsills, but it also allows you to harvest fresh garlic at home with minimal effort. Read on to discover how you can grow your own garlic in a plastic bottle, a perfect way to have a sustainable and fresh supply of this versatile herb.
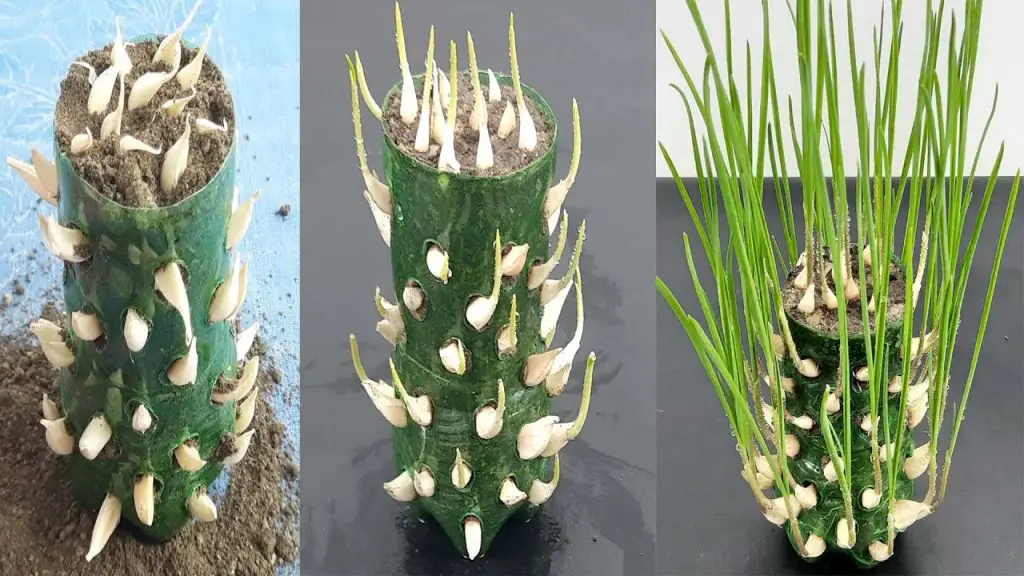
Why Grow Garlic in a Plastic Bottle?
Growing garlic in a plastic bottle is a space-saving and efficient method that allows you to enjoy fresh garlic even if you have limited space. Some of the key benefits of this method include:
- Easy to Manage: Plastic bottles are simple to set up and maintain, making them ideal for beginner gardeners.
- Perfect for Small Spaces: Whether you live in an apartment, have a balcony, or just lack garden space, growing garlic in a plastic bottle is a great solution.
- Sustainable: This method makes use of recycled materials and encourages eco-friendly gardening practices.
- Minimal Maintenance: Garlic is relatively low-maintenance, and when grown in a bottle, it’s even easier to keep an eye on water levels and drainage.
Materials You’ll Need to Grow Garlic in a Plastic Bottle
Before starting your garlic-growing adventure, gather the following materials:
- Plastic bottle (1.5L or 2L size works best)
- Sharp scissors or knife to cut the bottle
- Potting soil or organic compost
- Garlic cloves (choose organic, non-sprayed garlic for the best results)
- A small piece of cloth or mesh (optional, to cover the top of the bottle)
- Water
Step-by-Step Guide to Growing Garlic in Plastic Bottles
Step 1: Prepare the Plastic Bottle
Start by selecting a plastic bottle that is clean and sturdy. The size of the bottle will depend on how many garlic bulbs you wish to grow, but generally, a 1.5L or 2L bottle is sufficient for a small crop.
- Cut the Bottle: Use scissors or a knife to cut the top off the plastic bottle. The top should be cut about 3-4 inches down from the neck of the bottle, creating a wide opening. This will allow you to fill the bottle with soil and plant your garlic.
- Make Drainage Holes: It’s important for your garlic to have proper drainage. Use a sharp object (like a knife or nail) to poke several small holes in the bottom of the bottle. This will allow excess water to escape and prevent the garlic bulbs from rotting.
Step 2: Add the Soil
- Fill the Bottle with Soil: Fill the bottom of the plastic bottle with potting soil or organic compost. You’ll want to add enough soil to give the garlic roots plenty of room to grow, but don’t overfill it. Leave about 2-3 inches of space at the top to avoid spillage when watering.
- Tamp Down the Soil: Lightly press the soil down with your fingers to ensure it’s compacted and secure, but don’t make it too dense, as garlic needs some air circulation to grow well.
Step 3: Plant the Garlic Cloves
- Prepare the Garlic: Choose healthy, large garlic cloves from a bulb. Select cloves that are plump and firm, and avoid cloves that have any signs of rot or mold. Peel the cloves, but leave the papery skin on.
- Plant the Cloves: Plant each garlic clove with the pointy side up. Make a small hole in the soil using your finger or a stick, and place the clove in the hole so that the tip is about 1 inch below the soil surface. Space each clove about 3-4 inches apart, depending on the size of your bottle.
Step 4: Water the Garlic
- Water Gently: After planting, water the soil gently to settle it around the cloves. Ensure the soil is moist but not soaked. Garlic doesn’t like soggy soil, so be mindful of not overwatering.
- Maintain Moisture: Keep the soil consistently moist throughout the growing process, but allow it to dry slightly between waterings. You can water the garlic every few days or whenever the top of the soil starts to feel dry.
Step 5: Provide Adequate Light
Garlic needs plenty of light to grow strong and healthy. Place your plastic bottle in a bright location that receives at least 6 hours of sunlight each day. A sunny windowsill, balcony, or patio is ideal for growing garlic.
- Tip: If you don’t have access to a lot of natural sunlight, you can supplement with a grow light to ensure your garlic gets the light it needs.
Step 6: Care for Your Garlic
- Fertilization: Garlic doesn’t require a lot of fertilizer, but you can give it a light feeding every 2-3 weeks with an organic liquid fertilizer or a mixture of water and fish emulsion to promote healthy growth.
- Monitor Growth: As your garlic starts to grow, you’ll see green shoots appear. These are the garlic leaves. Keep an eye on the leaves for signs of yellowing or wilting, which may indicate a need for more water or light.
Step 7: Harvesting Garlic
After 2-3 months, your garlic will be ready to harvest. Look for signs that it’s time to harvest, such as:
- The garlic leaves will begin to yellow and die back.
- The roots of the garlic bulbs will start to show through the bottom drainage holes of the bottle.
To harvest, gently tip the bottle over and remove the garlic bulbs. Be careful not to damage the bulbs as you pull them out of the soil. Once harvested, allow the bulbs to cure in a dry, warm place for a few days to harden the skins.
Tips for Success
- Ensure proper drainage to avoid waterlogging the garlic bulbs.
- Don’t overwater your garlic. Keep the soil moist but not soaked.
- Use organic garlic cloves for the best results. Non-organic garlic may not sprout.
- Consider reusing the plastic bottle for future garlic crops, or try growing other herbs and vegetables in similar containers.
Conclusion: Growing Garlic in Plastic Bottles is Easy and Fun!
Growing garlic in a plastic bottle is a simple, fun, and innovative way to enjoy fresh garlic from the comfort of your home, even if you have limited space. By following these easy steps, you can grow your own garlic bulbs in just a few months and harvest them right from your recycled plastic bottle. This method not only saves space but also encourages a sustainable and eco-friendly gardening practice. So why not give it a try? Start your own garlic garden in a plastic bottle today! 🌱🧄