The Betel Nut tree, known scientifically as Areca catechu, is a tropical plant that produces the famous betel nuts, commonly used in many cultures for chewing, medicinal purposes, and even as part of ceremonial rituals. If you’ve ever wondered how to grow this exotic tree from a betel nut, the good news is that it’s a relatively easy and rewarding process. Whether you’re looking to start your own betel nut plantation or simply want to grow this tree at home, this guide will walk you through the essential steps to successfully grow a Betel Nut tree from a nut.
Why Grow a Betel Nut Tree?
Betel nuts have a rich cultural history and are widely consumed across Asia and parts of Africa. Growing your own Betel Nut tree offers various benefits, including:
- Cultural significance: Betel nuts are a central part of social rituals, especially in India, Southeast Asia, and the Pacific Islands.
- Medicinal uses: Betel nuts are believed to have digestive and oral health benefits.
- Aesthetic appeal: The Betel Nut tree itself is a beautiful tropical plant, with lush green leaves and a tall, slender trunk.
Step 1: Obtain Fresh Betel Nuts
To grow a Betel Nut tree, the first step is to obtain fresh, mature betel nuts. The nut must be fresh to ensure it still contains viable seeds. You can usually find them at local markets, specialty grocery stores, or online from seed suppliers.
What to look for:
- Choose fresh, ripe betel nuts that are still encased in their outer green shell. The nut should feel firm and not dried out.
- If possible, try to get organic betel nuts free from pesticides or other chemicals, especially if you’re planning to grow them in your garden.
Step 2: Preparing the Betel Nut for Planting
Before planting your betel nut, it’s important to prepare it properly to increase the chances of successful germination. Here’s how to do it:
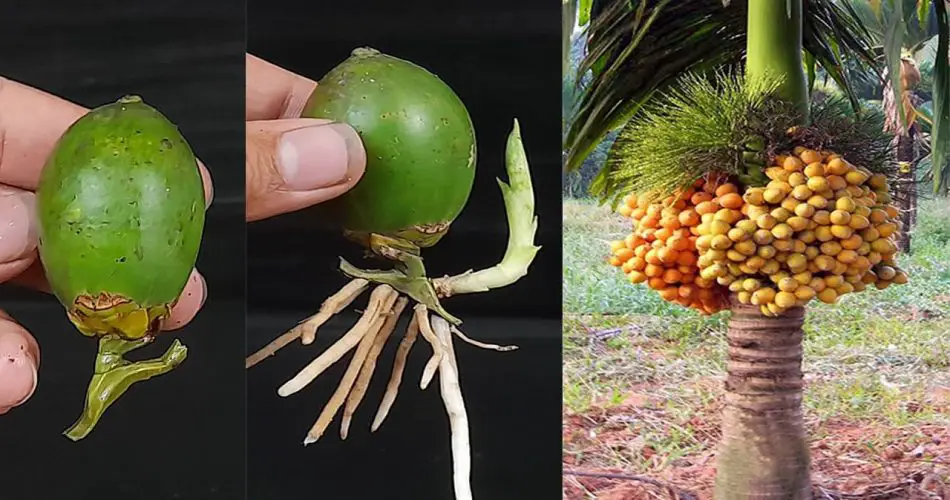
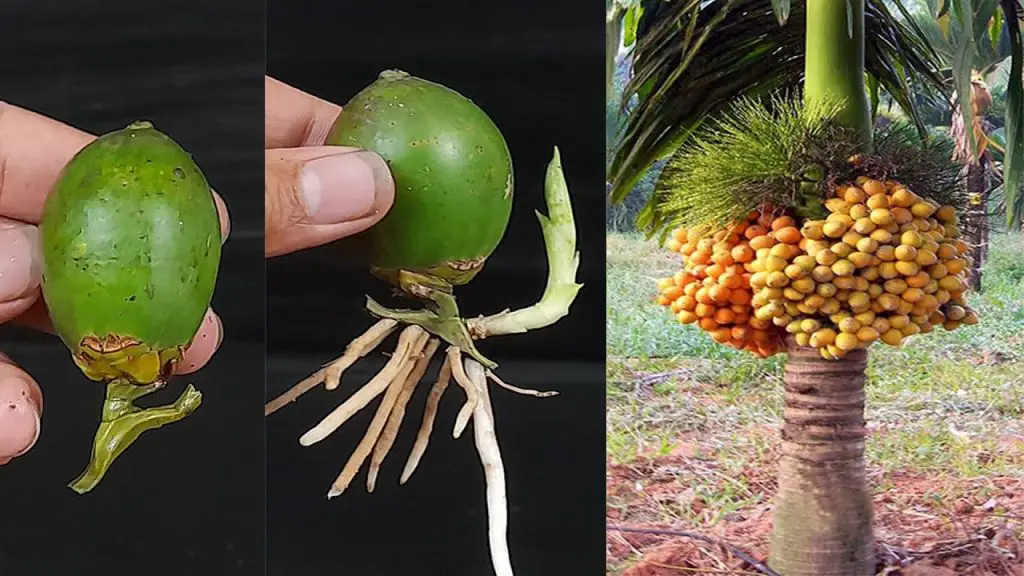
- Remove the outer shell: Carefully remove the green outer shell of the betel nut to reveal the seed inside. You can use a sharp knife to cut through the shell.
- Soak the seed: Place the seed in warm water for 1-2 days to soften the outer layer and promote germination. This step is essential to speed up the process and encourage faster sprouting.
- Inspect the seed: After soaking, make sure the seed is still firm and hasn’t started decaying. A healthy seed is essential for growing a healthy tree.
Step 3: Germinating the Betel Nut Seed
Betel nut seeds require a warm, humid environment to germinate. Here’s how to create the ideal conditions for sprouting:
- Prepare a planting container: Choose a container with good drainage to avoid waterlogging. Fill it with a well-draining potting mix. You can use a mix of peat moss, sand, and compost to create an ideal growing medium.
- Plant the seed: Place the betel nut seed about 2-3 cm deep into the soil. Gently cover it with soil, making sure the seed is well-enclosed but not too compacted.
- Maintain humidity: Place the container in a humid environment, such as a greenhouse or a plastic-covered tray, to create a mini greenhouse effect. You can also use a clear plastic bag to cover the pot and trap moisture.
- Warmth is key: Betel nuts germinate best at temperatures between 25-30°C (77-86°F). Keep the pot in a warm location, such as near a sunny window or in a warm room.
- Water regularly: Keep the soil lightly moist, but not soggy. Overwatering can lead to root rot, so water only when the top layer of soil feels dry.
Step 4: Transplanting the Seedling
Once the betel nut seed has germinated, it will develop a small shoot or seedling. This usually takes anywhere from 2 to 6 weeks, depending on the temperature and humidity conditions.
When the seedling has grown to about 6-8 inches tall and has a strong root system, you can transplant it into a larger pot or directly into the ground. Follow these steps for successful transplanting:
- Choose a sunny location: Betel Nut trees need plenty of sunlight to thrive. Choose a spot in your garden that receives direct sunlight for most of the day.
- Prepare the soil: Betel Nut trees prefer well-draining soil that is rich in organic matter. Ensure the soil is slightly acidic to neutral, with a pH between 5.5 and 7.0.
- Plant carefully: Dig a hole large enough to accommodate the root ball of the seedling. Place the seedling in the hole, ensuring the roots are spread out, and cover with soil.
- Water and mulch: Water the newly planted seedling thoroughly and add a layer of mulch around the base to retain moisture and regulate the soil temperature.
Step 5: Caring for Your Betel Nut Tree
Once your Betel Nut tree is established, it requires regular care to ensure healthy growth and fruit production:
- Watering: Keep the soil consistently moist, especially during hot weather. Betel Nut trees are drought-sensitive, so avoid letting the soil dry out completely.
- Fertilizing: Apply a balanced fertilizer every 4-6 weeks during the growing season to promote healthy foliage and fruit production.
- Pruning: Prune the tree regularly to remove dead or damaged leaves and encourage a strong, central trunk. Trim back any excessive growth to maintain a compact shape.
- Pest control: Watch out for pests like aphids, mites, and scale. Use organic insecticides or homemade remedies if needed.
- Support the tree: As the tree grows, it may need staking to provide support. This will prevent the trunk from leaning or bending.
Step 6: Harvesting Betel Nuts
After 3 to 5 years, your Betel Nut tree will start producing nuts. The betel nut fruits grow in clusters and mature over time. When the nuts turn from green to yellow or orange, they are ready to be harvested. Carefully cut the clusters from the tree and let the nuts dry before use.
Conclusion
Growing a Betel Nut tree from a betel nut is a simple yet rewarding process. By following these easy steps, you can cultivate your own tree and enjoy its beautiful leaves and unique fruits. Whether you grow it for its cultural significance, medicinal properties, or simply as an exotic addition to your garden, the Betel Nut tree is a great choice for tropical plant lovers.


