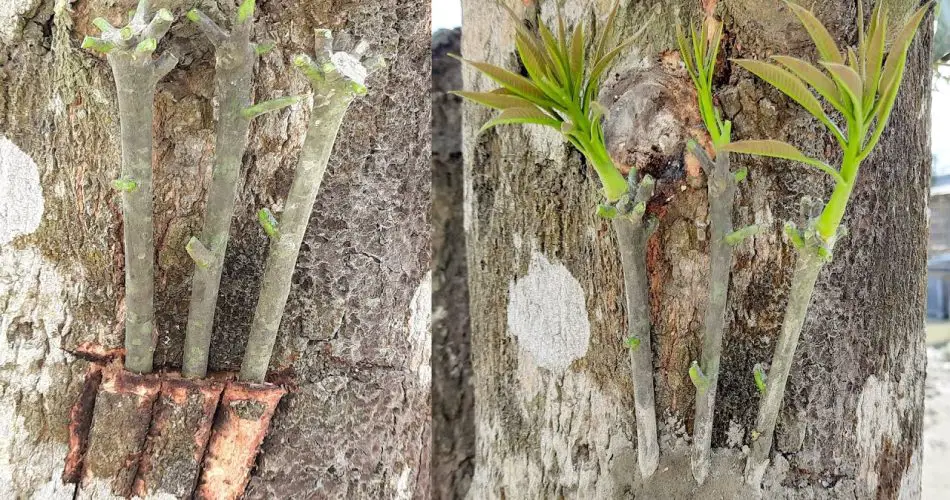
Grafting is an age-old technique used to combine different varieties of plants, and when it comes to mango trees, multi-grafting can lead to a unique and fruitful result. By grafting multiple varieties onto a single mango tree, you can enjoy a diverse range of mangoes all year round. If you’re interested in learning how to graft a mango tree, this simple and effective guide will help you understand the process and achieve success with your grafting efforts.
What is Multi-Grafting and Why Should You Do It?
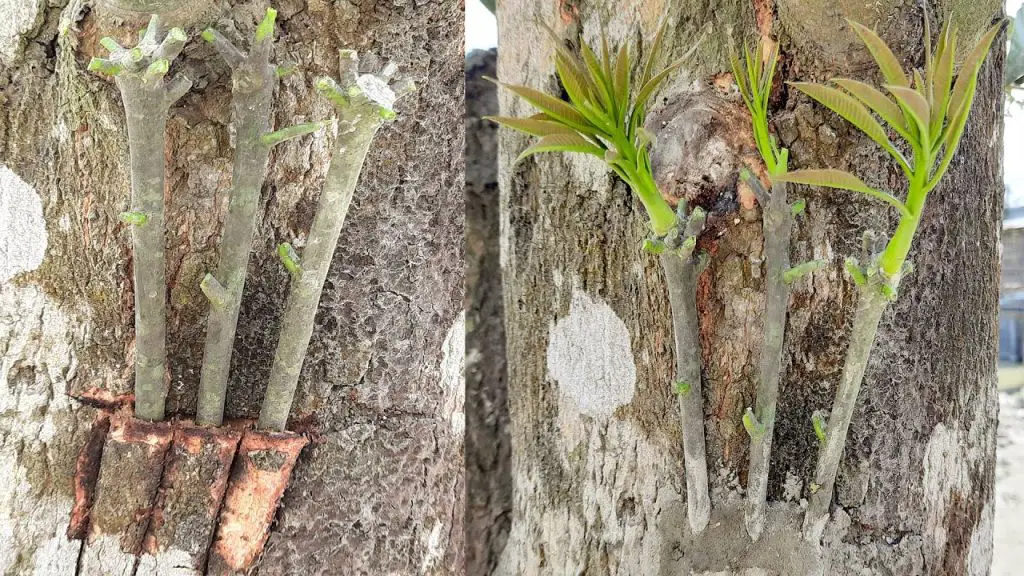
Multi-grafting is the process of grafting multiple varieties of mangoes onto one tree. This technique allows you to grow different types of mangoes without needing separate trees. It offers several advantages:
- Diverse Mango Varieties: By grafting multiple varieties, you can enjoy a variety of mangoes from the same tree.
- Space Efficiency: If you have limited garden space, multi-grafting is a great way to maximize the yield of your mango tree.
- Faster Fruit Production: Grafting can speed up fruit production compared to growing mango trees from seeds.
- Improved Disease Resistance: Some grafts may offer resistance to certain diseases or pests, improving the overall health of the tree.
Materials You Will Need for Grafting a Mango Tree
Before you start the grafting process, gather the following materials:
- Healthy mango tree as the rootstock (the tree you are grafting onto)
- Scion wood from the desired mango variety (this is the branch you will graft onto the rootstock)
- Sharp pruning knife or grafting tool
- Grafting tape or rubber bands
- Grafting wax or paraffin wax (optional)
- Sharp scissors or pruning shears
- Healthy, clean soil for planting after grafting
- Water to keep the grafts hydrated
Step-by-Step Guide to Multi-Grafting a Mango Tree
Step 1: Choose the Right Mango Tree and Varieties
- Select a strong rootstock: Choose a healthy, mature mango tree with strong root development. The rootstock should be free of diseases and pests to ensure the best success for your grafting.
- Pick compatible scion wood: Select different mango varieties that are compatible with your rootstock. The scion wood should come from healthy, disease-free trees.
Step 2: Prepare the Rootstock
- Cut back the rootstock: Select a young, healthy branch from the rootstock tree. Make a clean, horizontal cut just above a healthy bud.
- Remove any excess leaves: Trim away any leaves or branches that might obstruct the grafting process.
Step 3: Prepare the Scion Wood
- Cut the scion wood: Cut your scion wood to around 4-6 inches in length, making sure it contains at least 2-3 healthy buds.
- Shape the scion: Create a slanted cut at the bottom of the scion. The cut should be smooth and clean, so it will fit neatly into the rootstock cut.
Step 4: Graft the Scion onto the Rootstock
- Make a matching cut on the rootstock: Using a sharp knife, make a vertical cut on the rootstock where you want to attach the scion. The cut should match the angle of the scion cut for the best fit.
- Insert the scion into the rootstock: Carefully place the scion wood into the cut on the rootstock, ensuring the two cuts align perfectly. This is crucial for successful grafting, as the cambium layers (the growth layers of the tree) need to touch for the graft to take.
- Secure the graft: Use grafting tape or rubber bands to tightly secure the scion to the rootstock. This helps hold everything in place while the graft heals.
Step 5: Protect the Graft and Keep It Hydrated
- Apply grafting wax: If desired, apply grafting wax over the graft union to prevent moisture loss and protect the graft from pests and diseases.
- Maintain humidity: Cover the graft area with a plastic bag or use a humidity chamber to keep the grafting environment moist. This is important for the scion to take root and grow.
- Water regularly: Ensure the tree receives adequate water during the grafting process. The rootstock should be hydrated, but not waterlogged.
Step 6: Monitor the Grafting Process
- Check for successful grafting: After about 4-6 weeks, check the graft for signs of growth. If the graft is successful, you should see new growth sprouting from the scion.
- Remove the tape: Once the graft has successfully healed and the new growth is strong, carefully remove the grafting tape. This prevents any damage or constriction to the growing tissue.
Step 7: Care for the Grafted Mango Tree
- Prune the tree: Trim back any competing branches on the rootstock to allow the grafted scions to flourish.
- Provide proper nutrition: Continue to fertilize and water the mango tree as needed to promote healthy growth.
- Protect the tree: Watch for pests and diseases that may affect your grafted mango tree, and take preventive measures as needed.
Tips for Successful Multi-Grafting on Mango Trees
- Choose healthy scion wood: The quality of the scion wood is crucial for success. Use only healthy, disease-free branches from mature mango trees.
- Use clean, sharp tools: Clean your pruning knife and other tools to avoid introducing infections to the grafts.
- Graft in the right season: The best time for grafting mango trees is typically during the warmer months when the tree is actively growing.
- Be patient: Grafting takes time. It can take several weeks or even months for the graft to heal and the new growth to appear.
Conclusion
Multi-grafting is a fantastic technique for growing multiple mango varieties on a single tree, allowing you to enjoy a diverse mango harvest from just one tree. By following this simple, step-by-step process, you can successfully graft your mango tree and watch it thrive with multiple varieties of mangoes. Whether you’re looking to save space in your garden or experiment with different flavors, multi-grafting is an excellent way to diversify your fruit harvest. Try it out today and enjoy a bounty of delicious mangoes all year round!


