Thuja, commonly known as Arborvitae, is a popular evergreen tree known for its dense foliage and ability to thrive in a variety of climates. If you want to propagate Thuja at home, taking cuttings is an effective method. A particularly powerful, natural rooting aid that can boost success is aloe vera. Aloe vera contains enzymes and compounds that can help promote root growth and protect cuttings from infection. In this article, we’ll guide you through the simple steps to propagate Thuja from cuttings using aloe vera.
Why Use Aloe Vera for Propagating Thuja?
Aloe vera is packed with gibberellins, natural growth hormones that can stimulate the formation of roots. The gel inside the aloe vera leaves also contains antibacterial and antifungal properties, which help protect the cutting from rot or disease while it is developing roots. By using aloe vera in combination with the standard cutting propagation technique, you can increase the chances of success.
Materials You Will Need:
- Thuja tree cutting (healthy, non-flowering)
- Aloe vera gel (fresh or store-bought)
- Sharp pruning shears or scissors
- Rooting hormone powder (optional, but beneficial)
- Small pots or containers with drainage holes
- Well-draining soil (potting mix)
- Plastic wrap or a plastic bag (to create a humidity dome)
- Water
Step-by-Step Guide to Propagate Thuja from Cuttings Using Aloe Vera
Step 1: Select a Healthy Cutting
Start by choosing a healthy branch from a Thuja tree. Select a semi-hardwood cutting (a woody stem that is not too old or too green). The cutting should be around 4-6 inches long and have at least 2-3 nodes (small bumps or growth points where leaves emerge). Make sure the cutting is free from disease or pests.
Use sharp pruning shears or scissors to make a clean, angled cut just below a node. This will encourage the cutting to grow roots from the base.
Step 2: Prepare the Aloe Vera Gel
If you have a fresh aloe vera leaf, cut off a piece from the plant. Cut it open to extract the gel inside. You’ll need about 1-2 tablespoons of aloe vera gel for each cutting. If you don’t have fresh aloe vera, you can use store-bought aloe vera gel—just make sure it contains mostly aloe and no harsh chemicals.
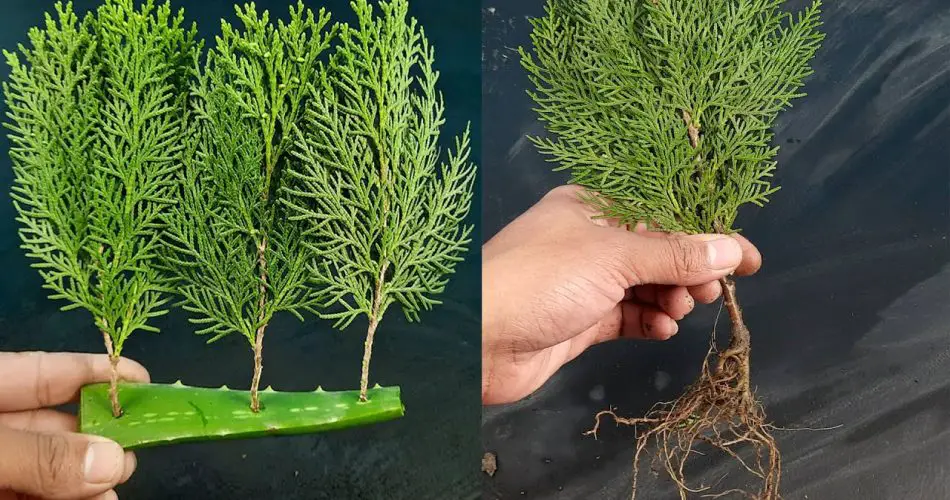
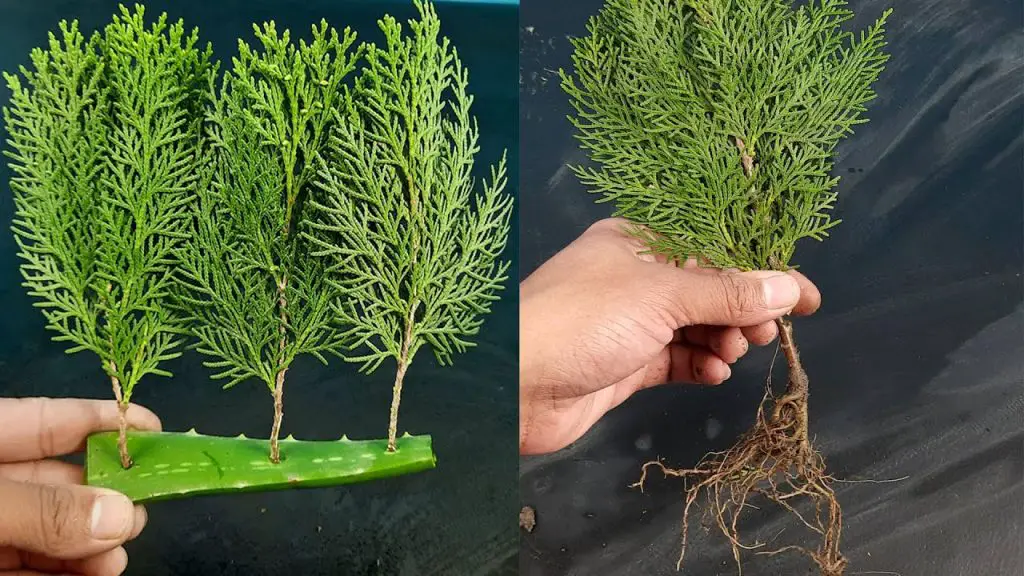
Step 3: Apply Aloe Vera Gel to the Cutting
Dip the cut end of the Thuja cutting into the aloe vera gel. Coat the bottom of the cutting where the roots will form. Aloe vera will act as a natural rooting hormone, promoting root growth and protecting the cutting from diseases.
Optional: If you want to increase the chances of success, you can also dip the cutting in a rooting hormone powder after applying the aloe vera gel. Rooting hormone can help speed up root formation, but aloe vera alone is often sufficient.
Step 4: Plant the Cutting in Soil
Prepare a small pot or container filled with well-draining soil or a potting mix. Poke a small hole in the soil with your finger or a stick, and gently insert the aloe vera-coated cutting into the hole. Firm the soil around the cutting to ensure it is secure.
Step 5: Create a Humid Environment
Thuja cuttings need humidity to encourage root growth. To create a humid environment, cover the pot with plastic wrap or place it inside a clear plastic bag. This will help maintain moisture and warmth around the cutting. If you’re using a plastic bag, make sure to leave a small opening for airflow to prevent mold growth.
Alternatively, you can use a mini greenhouse or a small, clear plastic dome to cover the cutting.
Step 6: Provide the Right Conditions
Place the cutting in a bright spot, but avoid direct sunlight as it can overheat and dry out the cutting. The ideal temperature for propagating Thuja cuttings is between 65-75°F (18-24°C).
Make sure to check the soil moisture regularly. Keep the soil moist, but not soggy, and ensure the cutting does not dry out. If needed, mist the cutting with water to maintain humidity levels.
Step 7: Wait for Roots to Develop
Rooting can take anywhere from 4 to 8 weeks for Thuja cuttings. During this time, it’s important to be patient and check regularly for root development. You can gently tug on the cutting to see if you feel resistance—this means the roots are starting to form.
Once the cutting has developed a healthy root system (you should see roots growing from the bottom of the pot), it’s ready to be transplanted into a larger pot or directly into the ground.
Step 8: Transplant the New Thuja Plant
When the roots are well-established and the cutting shows new growth, it’s time to transplant the Thuja cutting into a larger pot with well-draining soil, or directly into your garden if the weather permits. Water the young plant well and provide it with adequate sunlight.
Tips for Success:
- Cleanliness is Key: Ensure all your tools and containers are clean to prevent the spread of diseases or bacteria.
- Humidity: The cutting needs high humidity to root, so don’t skip the plastic cover or greenhouse effect.
- Light: Keep the cutting in a location with indirect sunlight to avoid overheating. Too much direct sunlight can stress the cutting.
- Watering: Be sure to keep the soil moist but never soggy. Root rot is a common issue with overwatering.
Why Aloe Vera is So Effective for Thuja Cuttings:
Aloe vera helps in rooting by providing the cutting with:
- Natural growth hormones: Promotes faster root formation.
- Antibacterial and antifungal properties: Reduces the risk of rot and infection.
- Moisture: Keeps the cutting hydrated during the early stages of root growth.
Conclusion:
Propagating Thuja from cuttings is an easy and rewarding process, and using aloe vera enhances your chances of success. By following these simple steps, you can grow a new Thuja tree at home without the need for complex equipment or rooting hormones. Aloe vera provides natural protection and promotes healthy roots, making it an excellent, eco-friendly choice for gardeners looking to propagate their favorite plants.
With patience and care, you’ll soon have a thriving Thuja tree to add beauty and greenery to your home or garden!


