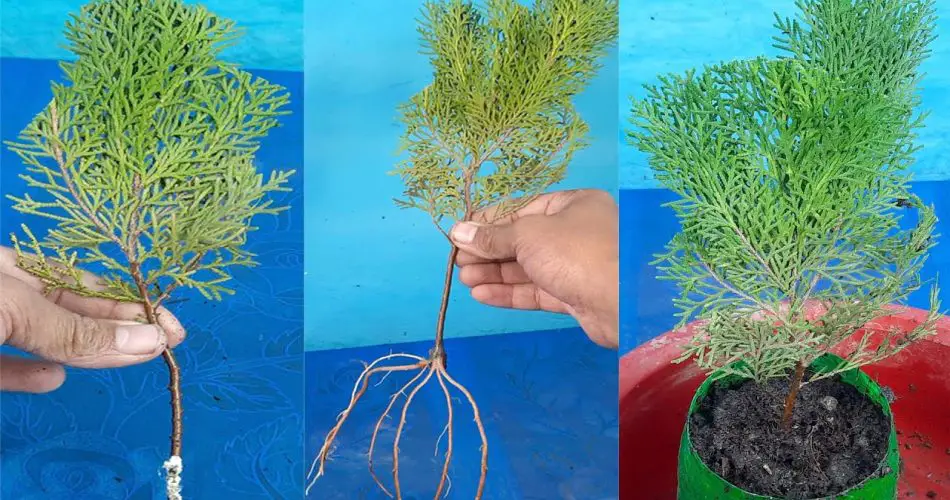
Growing Cypress (also known as Jhau or Thuja) from cuttings is a simple and rewarding way to propagate these attractive and hardy trees. Cypress trees are popular for their lush greenery, fast growth, and ability to provide privacy and windbreaks in gardens. By following the right steps, you can grow Cypress trees from cuttings and enjoy a thriving plant in no time.
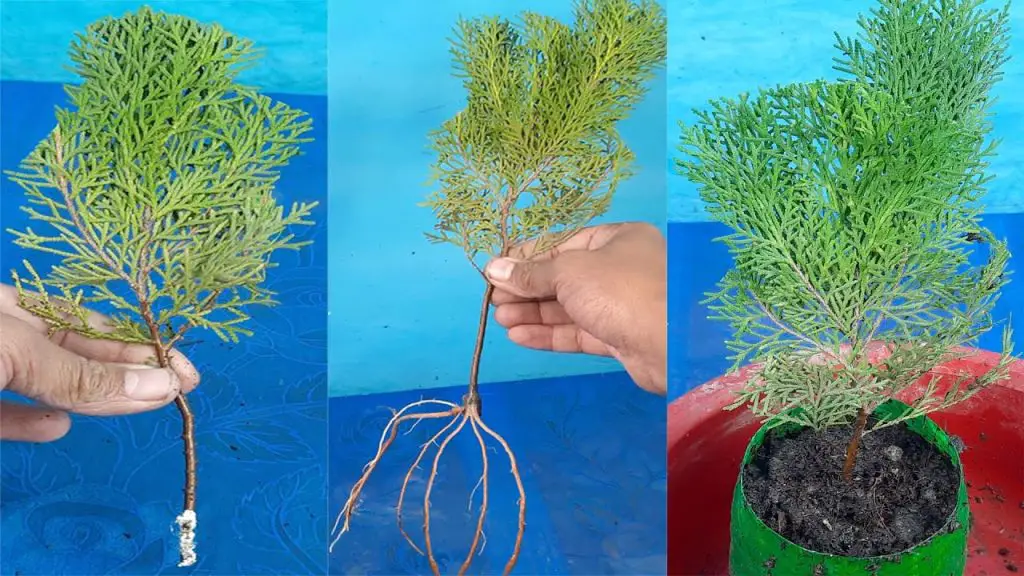
Here’s a detailed guide on how to grow Cypress from cuttings at home:
Why Grow Cypress from Cuttings?
- Easy Propagation: Growing Cypress from cuttings is a cost-effective way to multiply your existing trees.
- Faster Growth: Starting from cuttings can often produce plants faster than growing from seeds.
- Clonal Plants: Growing from cuttings ensures that the new plant will be genetically identical to the parent tree, preserving its traits.
Materials You Will Need:
- Healthy Cypress tree (parent plant)
- Sharp pruning shears or a clean knife
- Rooting hormone (optional but helpful)
- Small pots or containers
- Well-draining potting mix (a mixture of soil, sand, and perlite works well)
- Clear plastic bag or a plastic dome (to create humidity)
- Water (for keeping the cuttings moist)
- A clean, sharp scissors or knife (to make clean cuts)
- A tray or shallow container (optional for soaking the cuttings)
Step-by-Step Guide to Grow Cypress from Cuttings:
Step 1: Select Healthy Cuttings
- Choose a healthy Cypress tree (also known as Jhau or Thuja) to take the cuttings from. Look for a non-flowering branch with fresh, new growth, as these are most likely to root successfully.
- Cut a 6-8 inch (15-20 cm) long section of the branch. Ensure the cutting is from the tip of the branch or a lateral branch, which has soft, flexible growth. Avoid older, woody stems as they are less likely to root.
- Use sharp pruning shears or a sterilized knife to make a clean cut just below a leaf node (where the leaves emerge). This will help the cutting root more efficiently.
Step 2: Remove Lower Leaves
- Trim off the lower 2 inches (5 cm) of the cutting to expose the bare stem. Make sure to remove all the leaves from this section to prevent them from rotting in the soil.
- Leave some leaves at the top of the cutting so that it can still photosynthesize.
Step 3: Apply Rooting Hormone (Optional)
- To encourage faster rooting, dip the cut end of the Cypress cutting into rooting hormone. While this step isn’t always necessary, it can improve the chances of successful rooting and speed up the process.
- Tap off any excess powder to avoid clumping.
Step 4: Plant the Cutting
- Prepare a small pot or container filled with a well-draining potting mix. You can use a mix of potting soil, sand, and perlite to improve drainage.
- Make a small hole in the soil using a pencil or stick, then gently place the cutting into the hole. Make sure the cut end is buried at least 2 inches (5 cm) deep to ensure stability.
- Gently pack the soil around the base of the cutting to hold it in place.
Step 5: Water and Create Humidity
- Water the cutting thoroughly after planting it to help settle the soil around the cutting and ensure it is moist.
- To create a humid environment, cover the pot with a clear plastic bag or place it inside a plastic humidity dome. This will help retain moisture and create the conditions needed for the cutting to root.
- Ensure that the plastic does not touch the cutting directly. You can use small sticks to prop up the plastic and maintain some airflow.
- Keep the pot in a warm, shaded location with indirect sunlight. Direct sunlight can cause the cutting to overheat or dry out.
Step 6: Care for the Cutting
- Over the next few weeks, check the cutting regularly to ensure the soil stays moist but not soggy. Water the cutting whenever the soil feels dry to the touch, but be careful not to overwater as this can cause the cutting to rot.
- If you are using a plastic bag or humidity dome, ventilate it occasionally to prevent mold growth and to allow fresh air to reach the cutting.
- After about 4-6 weeks, gently tug on the cutting. If it resists, that’s a good sign that the roots are beginning to form.
Step 7: Transplant the Rooted Cutting
- Once the cutting has developed a healthy root system (usually after 2-3 months), it is ready to be transplanted into a larger pot or directly into the ground.
- Gently remove the cutting from the pot, being careful not to damage the roots.
- Transplant the young Cypress tree into a larger pot with more soil or into your garden. If transplanting into the garden, choose a location with well-draining soil and full to partial sunlight.
Step 8: Continue Care and Maintenance
- After transplanting, keep the new Cypress tree well-watered as it establishes its roots in its new location. Make sure to give it indirect sunlight until it adjusts to its new home.
- Fertilize the young tree with a balanced, slow-release fertilizer to promote strong growth.
- As the tree grows, prune it occasionally to maintain its shape and remove any dead or damaged branches.
Tips for Success:
- Humidity is key: The cutting needs to stay moist and in a humid environment to encourage rooting.
- Patience is important: Rooting can take time, so don’t be discouraged if it doesn’t happen immediately. Be patient and keep the cutting in a good environment.
- Use clean tools: Always sterilize your tools before cutting to prevent disease transmission.
- Temperature matters: Keep the cutting in a warm location, around 65-75°F (18-24°C), for optimal rooting.
Conclusion
Growing Cypress (Jhau or Thuja) from cuttings is a simple and rewarding process that allows you to propagate these beautiful trees at home. By following the steps outlined above—selecting healthy cuttings, using rooting hormone, providing the right environment, and ensuring consistent moisture—you can easily propagate Cypress trees and watch them grow into strong, healthy plants. This is an excellent way to increase your garden’s greenery and enjoy the beauty of these evergreen trees in your own backyard!


