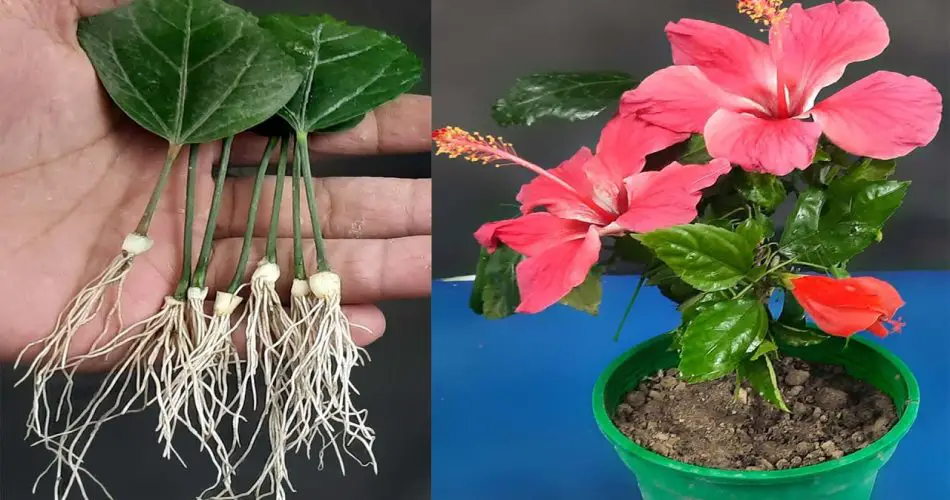
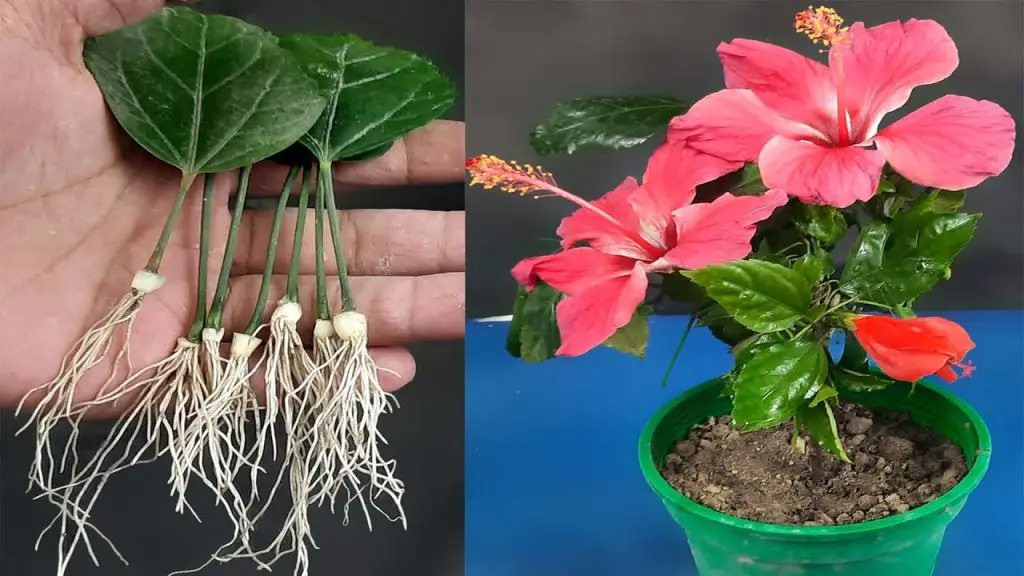
Hibiscus plants are known for their vibrant flowers and tropical beauty. While most people propagate hibiscus using stem cuttings, there’s an exciting new method for growing hibiscus from a leaf—and it’s surprisingly easy! If you’ve ever wondered how to propagate hibiscus from a leaf and enjoy a new plant without needing a stem cutting, this new method is for you.
In this guide, we’ll explore a step-by-step process for growing hibiscus from a leaf, allowing you to create new plants with minimal effort and a high success rate. Whether you’re a beginner gardener or an experienced plant lover, this method will help you expand your hibiscus collection.
Why Grow Hibiscus from a Leaf?
Propagating hibiscus from a leaf cutting is a unique and simple approach that doesn’t require a stem or any fancy tools. This method is ideal if you:
- Don’t have access to a healthy hibiscus stem.
- Want to try a new propagation technique.
- Prefer an easy and low-cost way to grow more hibiscus plants.
Materials You’ll Need:
- Healthy hibiscus leaf (firm and mature)
- Sharp scissors or pruning shears
- Coarse sand (well-draining)
- Plastic container or shallow tray (with drainage holes)
- Plastic wrap or plastic bag (to create humidity)
- Rooting hormone (optional, but helps speed up rooting)
- Water
- Indirect sunlight or a bright spot
Step-by-Step Guide: How to Grow Hibiscus from a Leaf
Step 1: Select the Right Hibiscus Leaf
Choose a healthy hibiscus leaf from a mature plant. Make sure the leaf is firm, free from diseases, and in good condition. It’s best to use leaves that are already a bit older because they contain the nutrients needed to grow roots. Use sharp scissors to cut the leaf at the base of the stem. It’s important to only take one leaf cutting for each propagation attempt.
Step 2: Prepare the Growing Medium
Hibiscus leaves root best in a well-draining medium, and coarse sand is perfect for this purpose. Sand allows water to drain quickly and prevents the cutting from becoming waterlogged, which can lead to rotting. Fill your container or shallow tray with clean sand to a depth of about 2-3 inches.
Step 3: Optional – Apply Rooting Hormone
Although hibiscus can propagate without rooting hormone, using it can help stimulate root growth and speed up the process. If you choose to use a rooting hormone, dip the cut edge of the hibiscus leaf into the powder. Make sure it’s coated evenly, but not too thickly.
Step 4: Insert the Leaf into the Sand
Create a small hole in the sand using your finger or a stick. Gently place the cut edge of the leaf into the hole, making sure it is stable and properly anchored. The leaf should sit upright, with the cut edge buried slightly into the sand. Avoid burying the entire leaf—just the base where the roots will emerge.
Step 5: Create a Humid Environment
To help the leaf develop roots, you need to keep the environment humid. Cover the container with plastic wrap or place it inside a plastic bag to trap moisture. This will create a mini greenhouse effect, which helps the leaf root successfully. Make sure the plastic doesn’t touch the leaf to prevent mold growth.
Step 6: Place the Container in a Warm, Bright Spot
Place the container in an area that receives indirect sunlight. Hibiscus needs warmth to root, but direct sunlight can scorch the leaf and hinder its ability to grow roots. A bright windowsill or a location with filtered sunlight is ideal. The temperature should be between 65°F to 75°F (18°C to 24°C).
Step 7: Water Regularly
Keep the sand moist, but not soaking wet. Hibiscus cuttings need consistent moisture to develop roots, so water the sand lightly every few days. Use a spray bottle to mist the cutting and prevent the sand from drying out too quickly. However, avoid overwatering, as this can cause the cutting to rot.
Step 8: Monitor for Root Growth
In about 3 to 6 weeks, you should start seeing root formation. You can gently tug on the leaf to feel for resistance, which indicates that roots have developed. If the leaf starts to feel firm and doesn’t easily pull out of the sand, it’s a sign that it’s successfully rooting.
Step 9: Transplant the Rooted Leaf
Once the hibiscus cutting has formed a strong enough root system, it’s time to transplant it into a pot with well-draining soil or directly into your garden. Be gentle when handling the roots, as they can be fragile at first. Plant the rooted leaf in a small pot with potting mix, and keep the plant in a warm, sunny spot until it establishes itself further.
Why Use This Method for Hibiscus Propagation?
There are several benefits to propagating hibiscus from leaves:
- Simple: This method doesn’t require stem cuttings, making it ideal for beginners or when stems are unavailable.
- Cost-Effective: You don’t need any fancy equipment—just sand, a healthy leaf, and a container.
- Low Maintenance: Once set up, this method requires minimal care. Just keep the sand moist and the environment humid.
- Success Rate: When done properly, hibiscus leaf propagation has a high success rate, with new plants growing strong roots and vibrant foliage.
Conclusion:
Growing hibiscus from a leaf is a new and exciting method that simplifies propagation, making it accessible to gardeners of all levels. By following these easy steps, you can propagate hibiscus plants at home with minimal effort and see them thrive in your garden. Whether you’re adding to your collection or just starting with hibiscus, this method is a great way to grow more beautiful blooms and enjoy the process of nurturing new plants from leaves.


