If you’re looking for a creative and sustainable way to grow orchids, using coconut shells as pots is an excellent idea! Not only does this approach reduce waste, but it also provides your orchid plants with a natural environment that promotes healthy growth. Here’s a step-by-step guide to turning a simple coconut shell into a unique and functional orchid pot.
Why Choose Coconut Shells for Orchids?

Coconut shells are ideal for growing orchids due to their natural properties:
- Drainage: The porous surface ensures proper water drainage, preventing root rot.
- Aeration: Orchids thrive in well-aerated environments, and coconut shells provide ample airflow.
- Eco-Friendly: Repurposing coconut shells minimizes waste and aligns with sustainable gardening practices.
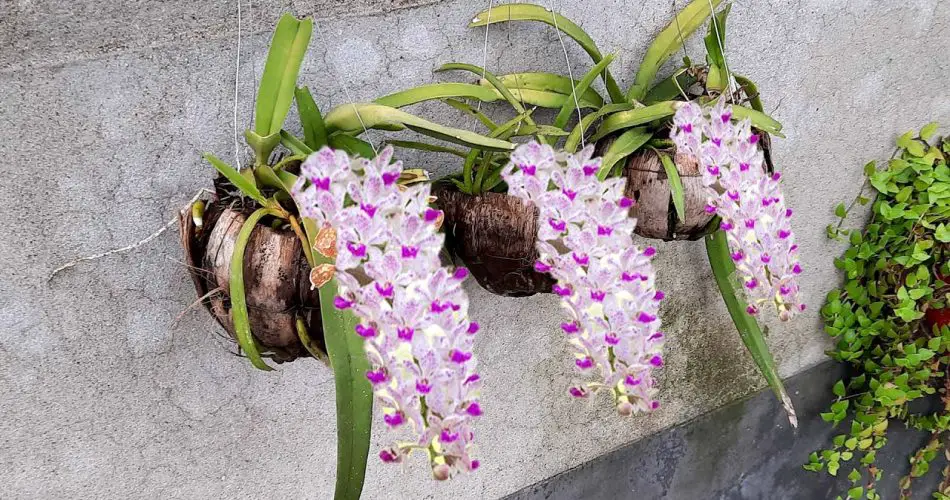
- Aesthetic Appeal: These natural pots give a rustic, tropical vibe to your garden or indoor space.
How to Make an Orchid Pot with a Coconut Shell
Step 1: Prepare the Coconut Shell
- Select a Mature Coconut: Use a dry, mature coconut with a hard shell.
- Cut the Shell: Using a saw, carefully cut the coconut in half. You can also leave a small opening on one side if you prefer a hanging pot.
- Remove the Husk and Flesh: Scoop out all the coconut flesh and clean the inside thoroughly.
Step 2: Create Drainage Holes
- Drill a few small holes at the bottom of the shell for proper drainage. This prevents water from accumulating and keeps the orchid roots healthy.
Step 3: Add Potting Material
- Fill the coconut shell with an orchid-friendly potting mix, such as a combination of:
- Bark chips.
- Charcoal.
- Sphagnum moss.
Planting Orchids in the Coconut Shell
- Choose the Right Orchid: Epiphytic orchids like Phalaenopsis, Dendrobium, or Cattleya are perfect for this setup.
- Place the Orchid: Gently position the orchid in the coconut shell, ensuring its roots are spread evenly.
- Secure the Plant: Add more potting mix around the roots to stabilize the orchid.
Caring for Orchids in Coconut Shell Pots
- Watering: Water the orchid only when the potting mix feels dry. Coconut shells dry out faster, so monitor the moisture level regularly.
- Light: Place the orchid pot in a location with indirect sunlight, as orchids prefer bright but not harsh light.
- Fertilization: Use a balanced orchid fertilizer once every two weeks to promote growth and flowering.
- Maintenance: Over time, the coconut shell may decompose. If this happens, repot the orchid into a new shell or traditional pot.
Benefits of Growing Orchids in Coconut Shells
- Enhanced Root Growth: The natural texture of the coconut shell encourages strong, healthy roots.
- Sustainability: By reusing coconut shells, you contribute to eco-friendly gardening practices.
- Unique Decoration: These rustic pots add a touch of charm to any indoor or outdoor space.
Conclusion
Creating orchid pots with coconut shells is a rewarding and sustainable gardening project. Not only do the orchids flourish in their natural-style environment, but the shells also make for an eye-catching display. Whether you’re an experienced gardener or just starting, this method is a fun and eco-friendly way to grow orchids. So, grab a coconut, unleash your creativity, and let your orchids thrive in their new tropical home! 🌸


