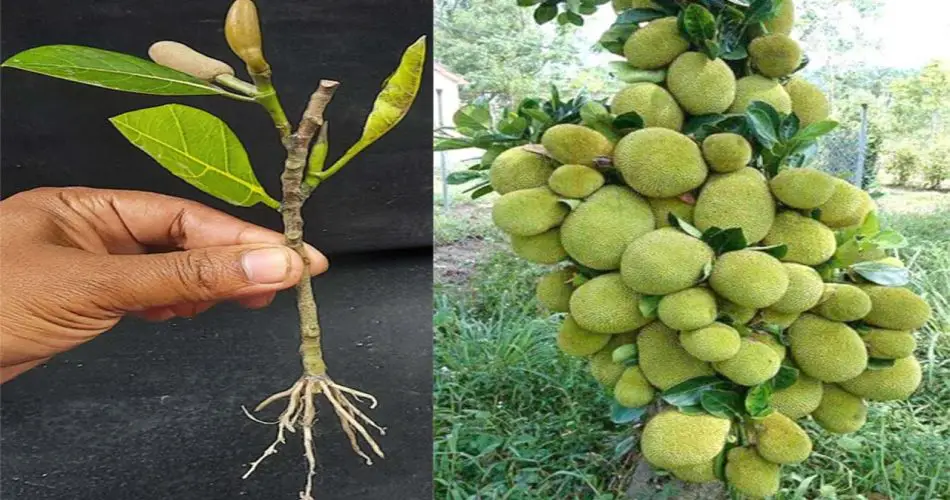
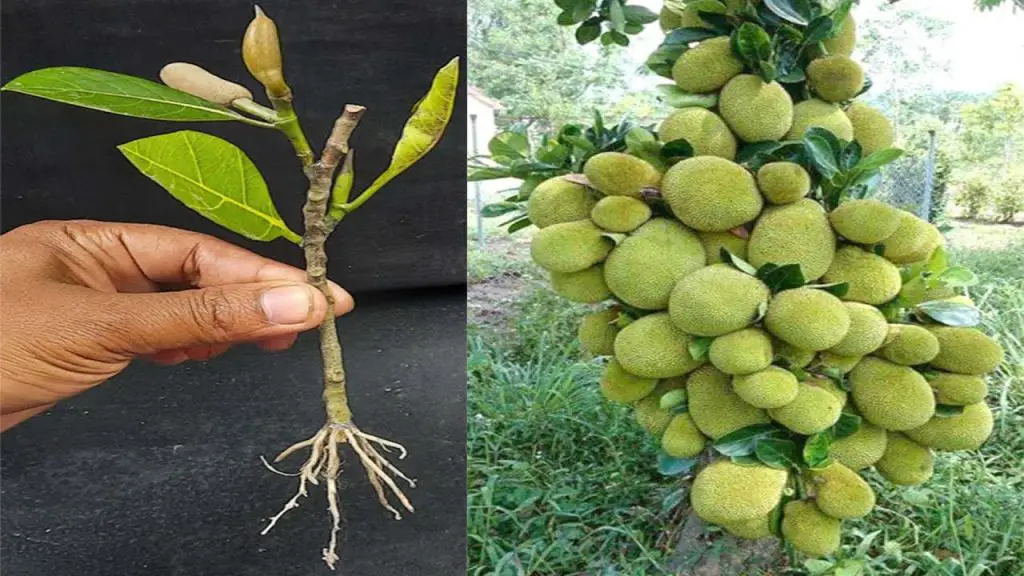
The jackfruit tree (Artocarpus heterophyllus) is a tropical wonder, known for its large, sweet fruits and impressive growth. While growing a jackfruit tree from seed can take a long time, using cuttings is a much faster and more reliable way to propagate this tree, especially in a container. In this article, we’ll explore a jackfruit tree cutting technique that guarantees a 100% success rate when propagated in a container.
Why Propagate Jackfruit Trees from Cuttings?
Propagating a jackfruit tree from cuttings offers several advantages:
- Faster growth: Trees grown from cuttings mature quicker than those grown from seed.
- Genetic consistency: The tree will be a genetic clone of the parent, ensuring you get the same quality fruit.
- Space-saving: Growing in a container allows you to manage space effectively, especially for those with limited gardening space.
Materials Needed for Propagating Jackfruit from Cuttings
Before you begin, gather these materials:
- Healthy jackfruit tree (parent plant)
- Sharp pruning shears or knife
- Container with drainage holes
- Well-draining potting mix (such as a mix of peat, perlite, and compost)
- Rooting hormone (optional, but can improve success)
- Plastic bag or humidity dome (to maintain humidity)
- Watering can or spray bottle
- Clean towel or paper towel
Step-by-Step Guide to Propagating Jackfruit Tree Cuttings in a Container
Step 1: Selecting the Right Cutting
- Choose a healthy parent tree: Look for a jackfruit tree that is disease-free and healthy. This ensures the best chance of success for your cutting.
- Cutting selection: Select a young branch that is not too old or too green. Ideally, look for a semi-hardwood cutting, which is about 6-8 inches long and has a leaf node.
- Make the cut: Using sharp pruning shears, make a clean cut just below a leaf node. Be sure the cutting is free of any damaged parts.
Step 2: Prepare the Cutting for Rooting
- Remove excess leaves: Trim the leaves on the lower part of the cutting, leaving only the top 2-3 leaves. This reduces water loss and helps focus the plant’s energy on root growth.
- Optional: Apply rooting hormone: Dip the cut end of the cutting in rooting hormone to encourage root development. While this step is optional, it can speed up the rooting process and improve your chances of success.
Step 3: Prepare the Container and Soil
- Choose the right container: Select a container with drainage holes to avoid waterlogging, which can cause root rot.
- Prepare the soil: Fill the container with a well-draining potting mix. A mix of peat, perlite, and compost is ideal for ensuring good drainage and providing enough nutrients for the cutting.
- Water the soil: Thoroughly moisten the soil before planting the cutting to ensure the environment stays moist but not waterlogged.
Step 4: Plant the Cutting
- Plant the cutting: Insert the cutting into the soil about 2-3 inches deep, ensuring that the cut end is fully covered. Gently press the soil around the cutting to secure it.
- Water gently: After planting, water the cutting lightly to ensure it settles into the soil. Use a watering can or spray bottle to avoid disturbing the cutting.
Step 5: Create a Humid Environment
- Cover the cutting: To keep the cutting in a humid environment, cover it with a plastic bag or use a humidity dome. This will prevent the cutting from drying out and promote faster root development.
- Ensure proper air circulation: While keeping the cutting humid is essential, make sure there is also some air circulation to prevent mold or fungal growth. You can poke a few holes in the plastic or leave it slightly open at the base.
Step 6: Care for the Cutting
- Maintain humidity: Keep the cutting in a warm, humid environment. The ideal temperature for rooting is between 75°F to 85°F (24°C to 29°C).
- Check for roots: After about 3-4 weeks, check the cutting for root development. You can gently tug on the cutting to see if it has anchored into the soil. If resistance is felt, the roots are forming.
- Water regularly: Keep the soil moist but not soggy. Water as needed, ensuring that the soil does not dry out completely.
Step 7: Transplanting the Rooted Cutting
- Transplanting: Once the cutting has developed a strong root system, typically after 6-8 weeks, it can be transplanted into a larger container or directly into the ground, depending on your space and climate conditions.
- Gradual exposure: If you plan to move the tree outside, gradually acclimate it to sunlight by placing it in a shaded area for a few days before moving it into full sun.
Tips for Success
- Patience is key: Rooting can take some time, and the process may take up to 2 months. Be patient, and continue to care for your cutting during this time.
- Maintain consistent moisture: The cutting needs consistent moisture, but avoid overwatering. Let the top layer of soil dry slightly before watering again.
- Use a well-draining potting mix: Ensure that the mix provides proper drainage to avoid root rot.
- Warm and humid conditions: Keeping the cutting in warm, humid conditions is essential for successful rooting.
Conclusion
Propagating a jackfruit tree from cuttings in a container is an excellent and efficient method to grow a healthy and productive tree. By following this step-by-step technique, you can successfully grow a jackfruit tree and enjoy its tropical beauty and delicious fruits in no time. With the right care and attention, your jackfruit tree cutting will thrive and reward you with lush growth and, eventually, fruit. Happy gardening! 🌳


