
Chrysanthemums, commonly known as mums, are vibrant, colorful flowers that are a popular choice for gardens, especially in the fall. One of the best ways to grow more chrysanthemums is by propagating them through cuttings. This method ensures that the new plants are genetically identical to the parent, ensuring the same beautiful blooms year after year. Here’s how to propagate chrysanthemums from cuttings, ensuring successful growth for your garden.
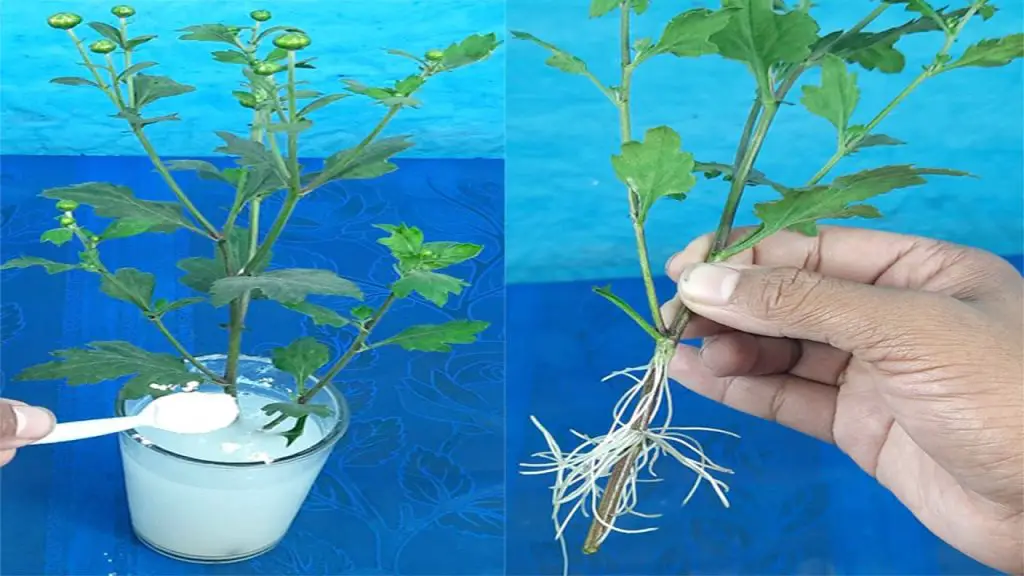
Why Propagate Chrysanthemums from Cuttings?
There are several benefits to propagating chrysanthemums from cuttings:
- Genetic Consistency: Cuttings produce plants that are exact replicas of the parent plant. This ensures you get the same beautiful flowers, color, and size.
- Faster Growth: Starting with cuttings can result in quicker growth compared to starting from seeds.
- Cost-Effective: Propagating from cuttings allows you to grow multiple plants from a single plant, saving you money on buying new ones.
- Control Over Plant Health: By taking healthy cuttings and ensuring the right conditions, you can avoid diseases and pests that may affect seeds or older plants.
Step-by-Step Guide: How to Propagate Chrysanthemums from Cuttings
- Choose a Healthy Parent Plant
Start with a healthy, mature mum plant. It should be free from diseases or pests. Choose a vibrant, well-established plant that is actively growing. You want a plant that is not too old or too young, ideally one that’s reached its full size for the season. - Prepare Your Tools and Materials
You’ll need the following tools and materials for the cutting process:- A sharp sterilized knife or pruning shears
- Rooting hormone (optional, but helpful for quicker root development)
- Potting soil or a well-draining seed-starting mix
- A small pot with drainage holes
- A plastic cover or plastic bag to create a humid environment
- Take the Cuttings
Select a healthy stem from the parent plant that is about 4-6 inches long. It should be from non-flowering shoots, as flowering stems are not ideal for propagation. Make the cut just below a leaf node (the small bump where leaves emerge from the stem). Remove any leaves from the bottom half of the cutting to expose the stem. - Apply Rooting Hormone (Optional)
If you choose to use rooting hormone, dip the cut end of the stem into the hormone powder. Rooting hormone can encourage faster and stronger root growth. While not always necessary, it can help increase your chances of success, especially in tough conditions. - Plant the Cutting
Insert the prepared cutting into a small pot filled with moist, well-draining soil. Make a hole in the soil with a stick or pencil, then gently insert the cutting about 1-2 inches deep. Press the soil gently around the base of the cutting to secure it in place. - Create a Humid Environment
Chrysanthemums thrive in humid conditions when they are first rooting. Cover the cutting with a plastic bag or a clear plastic dome to trap moisture and maintain a high humidity level. Ensure that the plastic doesn’t touch the leaves of the cutting, as this could cause rot. Make small holes in the plastic for air circulation to prevent mold growth. - Place in Indirect Light
Place the pot in a bright location with indirect light. Avoid direct sunlight, as it can be too harsh for young cuttings. The cutting needs enough light to grow but not so much that it dries out. - Keep the Soil Moist
Keep the soil consistently moist but not soaking wet. Check the soil regularly, and water as needed to maintain the right level of moisture. Overwatering can lead to rot, so ensure the soil drains well.
Caring for Your Chrysanthemum Cuttings
- Temperature
Chrysanthemum cuttings do best in a warm environment. Maintain a temperature of about 65-75°F (18-24°C) for optimal root development. Too cold, and the cuttings may not root; too hot, and they might dry out. - Check for Root Development
After about 2-4 weeks, gently tug on the cutting to check if it has developed roots. If you feel resistance, it means the roots are forming. You can also check the bottom of the pot for visible roots. - Transplanting the Cutting
Once the cutting has established a strong root system, you can transplant it into a larger pot or directly into your garden. If transplanting into a larger pot, use fertile, well-draining soil and ensure the new plant gets plenty of light to continue growing.
Troubleshooting Tips
- No Roots: If your cuttings haven’t developed roots after several weeks, it may be due to insufficient humidity, temperature, or light. Try moving the cuttings to a warmer location or adjust the humidity levels.
- Wilting: If the cuttings begin to wilt, check the soil moisture. Wilting can be a sign of underwatering or too much exposure to direct sunlight.
- Mold or Rot: Ensure that the cutting has good air circulation and that the plastic cover is not too tightly sealed. Mold can thrive in overly humid, stagnant conditions.
Conclusion
Propagating chrysanthemums from cuttings is a simple and effective way to grow new plants and expand your collection of beautiful flowers. By following the steps outlined above, you can quickly and easily propagate mums and enjoy their vibrant blooms in your garden year after year. Whether you’re an experienced gardener or a beginner, this propagation method ensures you have a steady supply of healthy, flowering plants to brighten up your space. With the right care and attention, your chrysanthemums will thrive and bring beauty to your garden for seasons to come.


