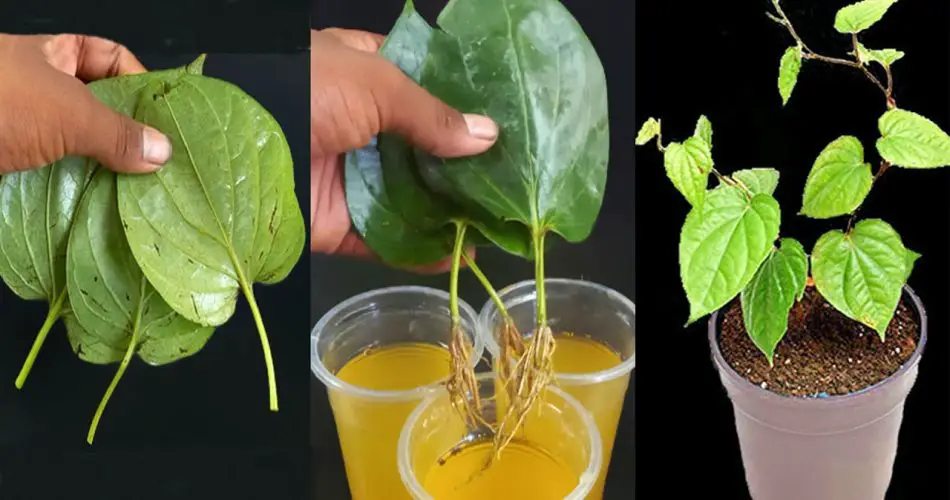
The betel plant (Piper betle), also known as paan, is a popular vine grown for its leaves, which are often used in traditional practices and for making the famous betel leaf chew. Propagating the betel plant is not only an easy and cost-effective way to grow this useful plant, but it also allows you to create more plants from just a single leaf cutting. In this article, we’ll walk you through the step-by-step process of propagating betel plants in water using a single leaf.
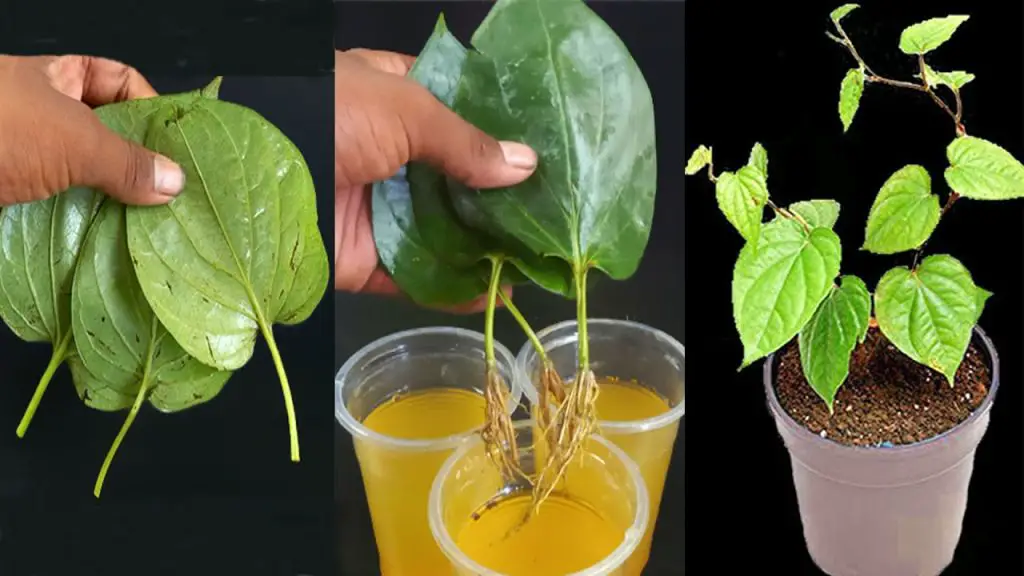
Why Propagate Betel Plant in Water?
Propagating betel plants in water is a popular method because:
- Simple and Beginner-Friendly: Water propagation is an easy and efficient way to root a cutting before planting it in soil.
- Cost-Effective: You don’t need to buy new plants each time you want more betel vines. Simply propagate using a leaf cutting.
- Faster Root Development: Roots often develop quicker in water, allowing the plant to be ready for transplanting sooner.
Materials You’ll Need
Before starting the propagation process, gather the following materials:
- Healthy Betel Leaf (cutting from a mature plant)
- A clean jar or glass container (preferably transparent so you can observe root growth)
- Clean water (preferably distilled or rainwater to avoid chlorine, which can damage the cutting)
- Sharp knife or pruning scissors
- A warm, bright spot with indirect sunlight for optimal rooting conditions
Step-by-Step Guide to Propagate Betel Plant in Water Using a Single Leaf
Step 1: Choose a Healthy Betel Leaf Cutting
- Select a mature leaf from a healthy betel plant. Look for a leaf that is vibrant, free from pests, and not too young or old.
- Use a sharp knife or scissors to make a clean cut. Aim for a stem cutting of about 4-6 inches (10-15 cm), ensuring the stem has at least one or two nodes (the areas where the roots will develop).
Step 2: Prepare the Cutting
- Remove excess leaves: Trim any excess leaves from the cutting, leaving only the stem. The leaves that remain should be healthy and undamaged.
- Submerge the cutting in water: Place the cut end of the stem in a clean glass jar or container filled with clean water. Ensure that only the stem is submerged in water, not the leaves. The water level should cover the node (the part of the stem where roots will form).
Step 3: Place the Cutting in an Ideal Location
- Find a warm, bright spot for your jar. Betel plants thrive in warm environments with indirect sunlight. A windowsill with morning sunlight works best.
- Avoid direct sunlight: Too much direct sunlight can cause the cutting to dry out or develop mold. Ideally, the temperature should be around 75-85°F (24-29°C).
Step 4: Maintain the Water Level and Cleanliness
- Change the water regularly (every 2-3 days) to prevent stagnation and the growth of algae. Ensure that the water level remains just above the node where roots are forming.
- Keep the water clean and free of debris. You can add a bit of liquid fertilizer to the water every couple of weeks to help promote root growth.
Step 5: Wait for Roots to Develop
- After a few weeks, you will start to see roots developing from the node of the cutting. Betel plants root fairly quickly, typically within 2-4 weeks, depending on environmental factors like temperature and light.
- Once you see a strong network of roots (around 2-3 inches long), the cutting is ready to be transplanted into the soil.
Step 6: Transplant the Rooted Cutting
- Once the roots are well-established, it’s time to transfer the rooted cutting into a pot or garden bed. Choose a well-draining potting mix or garden soil enriched with organic matter.
- Gently remove the cutting from the water and plant it in a pot. Water the soil well and place the pot in a shaded area for a few days to help the plant acclimate.
Step 7: Care for the Newly Transplanted Betel Plant
- Light: Betel plants prefer indirect light, so place them in a bright spot away from harsh sunlight. A location with filtered sunlight is ideal.
- Watering: Water the plant regularly, but ensure the soil doesn’t become waterlogged. Betel plants like humid environments, so mist the leaves occasionally if your indoor environment is dry.
- Temperature: Betel plants are tropical and need a warm environment to thrive. Avoid placing them in a place with cold drafts or sudden temperature changes.
Tips for Successful Propagation
- Choose a Healthy Mother Plant: Always propagate from a healthy and disease-free betel plant to ensure the cutting has a strong start.
- Use Clean Tools: To avoid contamination and disease transmission, always use sterilized scissors or knives when taking cuttings.
- Humidity: If you’re propagating indoors, you can increase the humidity around the cutting by placing a clear plastic bag or cloche over the jar (ensure it has ventilation holes).
Common Issues and Troubleshooting
- Yellowing Leaves: If the leaves of your cutting begin to yellow, it could be a sign of overexposure to sunlight or a lack of nutrients. Make sure the cutting is getting indirect light and consider changing the water.
- No Root Development: If no roots appear after a few weeks, the cutting might have been taken from an unhealthy plant, or the conditions (light, temperature, or water quality) may not be optimal. Try moving the cutting to a warmer or brighter location.
Conclusion
Propagating betel plants in water is a simple and effective method to grow your own paan plant at home. By using a healthy cutting and ensuring the right environmental conditions, you can easily grow a new betel plant to enjoy in your garden or as an indoor decorative plant. Remember to change the water regularly, provide indirect sunlight, and give your cutting time to develop healthy roots before transplanting it into the soil. With patience and proper care, you’ll soon have your own thriving betel plant!


