
The Elephant Apple (scientifically known as Dillenia indica), also known as Chalta in many parts of Asia, is a unique fruit tree known for its large, tangy fruit and beautiful foliage. Growing an Elephant Apple tree from a cutting is a rewarding process, and with the right technique, you can quickly establish a healthy tree in your garden. This article will guide you on how to grow Elephant Apple from cuttings to enjoy both its aesthetic and fruit-bearing benefits.
Why Choose Elephant Apple?
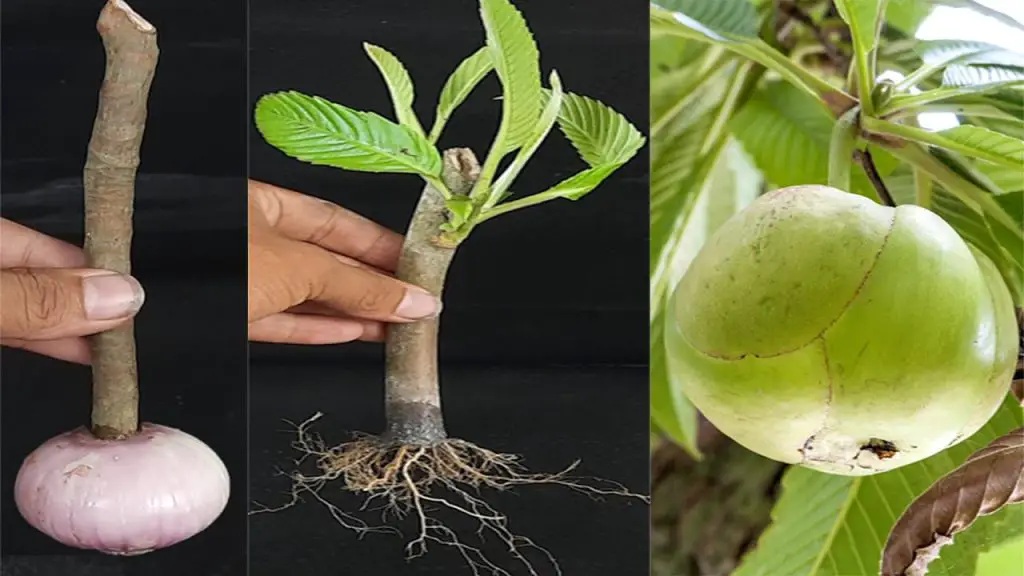
Elephant Apple trees are not only attractive but also produce edible fruit that has a tart, citrusy flavor. These trees are native to the tropical and subtropical regions of Asia, making them ideal for gardens in humid climates. The fruit of the tree is used in various traditional dishes and medicinal preparations. Growing Elephant Apple from cuttings is an easy way to start a tree in your garden without waiting for years.
- Fruitful tree: The fruit is nutritious and versatile.
- Fast growth: Starting from cuttings is a quicker way to grow the tree.
- Beautiful tree: The tree’s green foliage and flowers enhance your garden’s appearance.
Materials You Will Need:
- Healthy Elephant Apple cutting (approximately 6-8 inches long)
- Sharp pruning shears or knife
- Rooting hormone (optional but recommended for quicker rooting)
- A pot with good drainage
- Well-draining potting mix
- Plastic bag or plastic wrap (for humidity)
- Water (clean and room temperature)
- A warm, shaded location with indirect sunlight
Step-by-Step Guide to Growing Elephant Apple from Cuttings
Step 1: Prepare the Cutting
Start by selecting a healthy, mature branch from a parent Elephant Apple tree. Use sharp pruning shears or a knife to cut a 6-8 inch long piece of stem from the tree. Make sure the cutting has at least one node (the point where leaves sprout). A cutting with a few leaves attached is ideal.
- Tip: Choose a stem that is not too young or too old. A semi-woody stem works best for propagation.
Step 2: Remove Leaves and Prepare the Cutting
After cutting, remove the leaves from the lower half of the cutting to expose the stem. This will help prevent the leaves from rotting in the soil and reduce water loss.
- Tip: Keep a couple of leaves at the top of the cutting to aid in photosynthesis as the roots form.
Step 3: Apply Rooting Hormone (Optional)
To encourage faster root growth, dip the cut end of the Elephant Apple cutting into rooting hormone powder. This step is optional, but using rooting hormone increases the chances of successful rooting, especially for slower-growing species.
- Tip: Rooting hormone can be purchased from gardening stores, or you can use natural alternatives like cinnamon.
Step 4: Plant the Cutting in a Pot
Fill a pot with a well-draining potting mix. You can mix sand, perlite, or vermiculite with regular potting soil to ensure good drainage. Plant the cutting in the soil, burying the lower half of the stem where the leaves were removed.
- Tip: Make a small hole with a pencil or stick and insert the cutting gently. Press the soil around the base to hold the cutting in place.
Step 5: Create Humidity for Rooting
To promote rooting, create a humid environment around the cutting. Cover the cutting with a plastic bag or plastic wrap to trap moisture. Ensure that the plastic does not touch the leaves of the cutting.
- Tip: You can also use a clear plastic bottle cut in half to create a mini greenhouse effect.
Step 6: Place in a Warm, Shaded Location
Place the pot in a warm, shaded location where it will receive indirect sunlight. Elephant Apple cuttings prefer temperatures between 70°F to 85°F (21°C to 29°C) for optimal growth. Avoid placing it in direct sunlight, as this can cause the cutting to dry out.
- Tip: Ensure the cutting stays moist but not waterlogged. Check the humidity daily and mist the cutting if needed.
Step 7: Check for Root Growth
After about 4-6 weeks, the cutting should start to develop roots. To check, gently pull on the cutting; if it resists, it means the roots have formed. Once the roots are well-established, you can transplant the cutting into a larger pot or directly into the ground.
- Tip: Be patient, as root formation can take time. Keep the soil consistently moist but not soggy.
Caring for Your Elephant Apple Tree
Once your cutting has rooted and is ready for transplantation, continue to provide it with the following care:
- Sunlight: Elephant Apple trees need full sunlight for at least 6 hours per day.
- Watering: Water the plant regularly, ensuring the soil is kept moist but not waterlogged.
- Fertilizing: Use a balanced organic fertilizer during the growing season to encourage strong growth.
- Pruning: Trim any dead or damaged branches to promote a healthy, strong structure.
Conclusion
Growing an Elephant Apple tree from a cutting is an easy and rewarding process. With just a few simple steps, you can have your own Chalta tree that produces delicious fruits while adding beauty to your garden. Whether you’re planting it for its nutritious fruit, its attractive foliage, or both, this tree is a great addition to any garden. By following these steps and providing proper care, you’ll have a flourishing Elephant Apple tree in no time!
Happy gardening! 🌳🌱🍏


