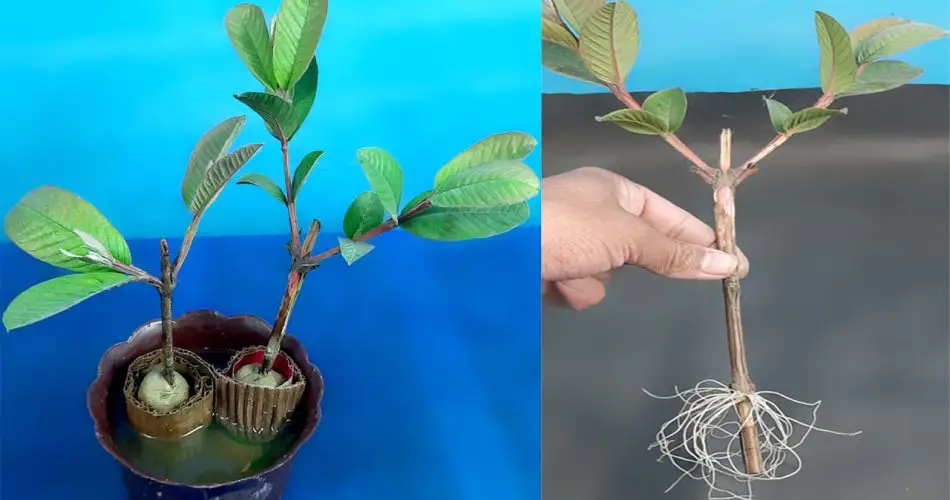
Growing a Guava tree from a cutting is an easy and cost-effective way to propagate this tropical fruit tree in your home garden. The Guava (Psidium guajava) is known for its delicious, sweet fruits and can thrive in a variety of climates. Whether you’re a beginner or an experienced gardener, using cuttings to grow a Guava tree can give you a head start and help you produce fruit in a relatively short amount of time. In this article, we’ll explore the new techniques to successfully propagate Guava trees from cuttings.

Step 1: Selecting the Right Cutting
The first step in growing a Guava tree from a cutting is to select the right branch. Choose a healthy and young stem that is around 6-8 inches long. The cutting should come from a mature guava tree that is free from pests and diseases. It’s important to select a semi-hardwood cutting, which is a branch that has started to mature but is not yet fully woody.
- Look for a straight, non-flowering stem with at least a few leaf nodes.
- Ensure the cutting is free from any visible disease or damage.
Step 2: Preparing the Cutting
Once you’ve selected the right cutting, it’s time to prepare it for planting.
- Trim the Cutting: Cut the stem just below a leaf node using sterile pruning shears or a sharp knife.
- Remove Lower Leaves: Strip the lower leaves off the cutting, leaving only the top few leaves. This helps reduce water loss and encourages root development.
- Optional – Dip in Rooting Hormone: While Guava trees are generally easy to root, you can dip the cut end of the cutting into a rooting hormone powder to increase the chances of successful root formation. Rooting hormones contain auxins that stimulate root growth and help speed up the rooting process.
Step 3: Preparing the Potting Mix
Guava trees need a well-draining soil mix to prevent root rot. For best results, you can create your own potting mix or buy one that’s suitable for tropical plants.
- A good mix could be made up of equal parts of sand, perlite, and peat moss or coconut coir.
- Fill a small pot (about 4-6 inches in diameter) with the prepared potting mix. Make sure the pot has drainage holes at the bottom to allow excess water to escape.
Step 4: Planting the Cutting
Now that your cutting is prepared and your potting mix is ready, it’s time to plant the cutting.
- Make a Hole: Use a stick or pencil to make a small hole in the center of the potting mix. The hole should be deep enough to accommodate the cutting’s lower end without damaging it.
- Insert the Cutting: Place the cutting into the hole, ensuring that the cut end is buried deep enough in the soil (about 2-3 inches deep). Gently firm the soil around the cutting to keep it upright.
- Water the Cutting: Water the cutting gently to settle the soil around the cutting. Make sure the soil is moist but not waterlogged. Overwatering can lead to rot.
Step 5: Creating the Right Environment for Rooting
To help the cutting establish roots, it needs a warm and humid environment.
- Humidity: Cover the pot with a plastic bag or use a mini greenhouse to retain humidity. This will create a controlled environment that helps the cutting root faster.
- Light: Place the pot in a location with indirect sunlight. Avoid direct sunlight, as this can scorch the cutting and dry it out too quickly.
- Temperature: Guava cuttings root best in temperatures between 75°F and 85°F (24°C-29°C). Ensure the cutting is kept in a warm environment with stable temperatures.
Step 6: Caring for the Cutting
After a few weeks, your Guava cutting will start to develop roots. During this time, proper care is essential to ensure healthy growth.
- Watering: Keep the soil consistently moist, but not soggy. Allow the soil to dry out slightly between waterings.
- Ventilation: If you’re using a plastic cover, remove it occasionally to allow fresh air to circulate. This prevents mold growth and keeps the cutting from overheating.
- Check for Roots: After 3-4 weeks, gently tug on the cutting to see if it has developed roots. If there is resistance, it means roots have started forming.
Step 7: Transplanting the Rooted Cutting
Once your cutting has developed strong roots, it’s time to transplant it into a larger pot or directly into the ground. Here’s how:
- Choose a Larger Pot: Select a pot that’s a few inches larger than the one used for rooting. Fill it with a well-draining potting mix suitable for tropical plants.
- Plant the Cutting: Gently remove the cutting from the rooting pot and plant it in the new pot. Make sure the roots are well-spread out and that the cutting is at the same soil level as it was before.
- Water and Care: Water the plant thoroughly after transplanting and keep it in a warm location with indirect sunlight.
Step 8: Ongoing Care for Guava Tree Growth
After transplanting, your Guava tree will continue to grow and establish itself. Ensure it receives the proper care:
- Sunlight: Guava trees thrive in full sun, so ensure it gets at least 6-8 hours of sunlight per day.
- Watering: Water the plant regularly, but allow the soil to dry between waterings. Guava trees are drought-tolerant, so be careful not to overwater.
- Fertilizing: Feed your Guava tree with a balanced fertilizer every 2-3 months to encourage strong growth and fruit production.
Conclusion
Growing a Guava tree from cutting is an easy and rewarding way to propagate this tropical fruit tree in your garden. By following these new techniques and providing the right care, you’ll be able to enjoy the sweet, delicious fruit of your very own Guava tree in no time. Whether you’re starting with a small cutting or expanding your collection of tropical trees, propagating Guava trees is a fun and satisfying gardening project. Happy planting!


