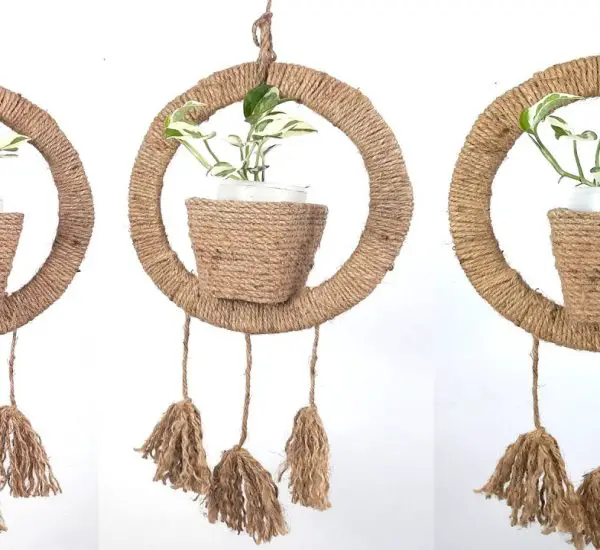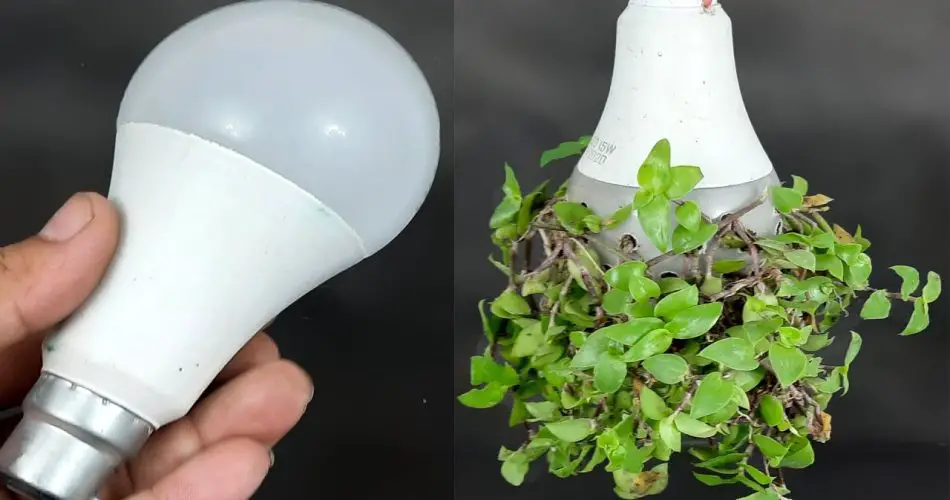
If you’re a fan of eco-friendly home decor and love to repurpose old items, then you’re in for a treat! One of the best ways to bring some greenery into your space is by recycling old LED bulbs and transforming them into unique hanging planters. Not only does this project help reduce waste, but it also adds a charming, rustic touch to your home decor. Plus, you’ll be creating your very own mini garden right inside your home!

In this DIY guide, we’ll show you how to turn those used LED bulbs into beautiful hanging planters for your favorite plants. These make for an excellent addition to any indoor garden, balcony, or even as a creative centerpiece. Let’s get started with this fun and simple project!
Why Use Old LED Bulbs for Hanging Plants?
Before diving into the DIY process, here are a few reasons why old LED bulbs make such a great material for hanging planters:
- Eco-Friendly: Repurposing old LED bulbs keeps them out of the landfill and gives them a second life. This is an easy way to practice sustainable living and reduce waste in your home.
- Unique Look: The glass bulb has a clear, sleek look that adds a modern touch to your home decor. You can create a vintage, rustic, or boho chic vibe by decorating the bulbs in various ways.
- Space-Saving: Hanging planters are ideal for small spaces, such as apartments or tiny homes. They allow you to add greenery without taking up valuable floor space.
- Customizable: You can choose the plants that best suit your aesthetic, whether it’s succulents, air plants, herbs, or flowering plants.
What You’ll Need:
Before starting your DIY project, gather the following materials:
- Old LED bulbs (used or burnt-out; you can get these for free if you have some lying around or ask around!)
- Small plants (succulents, air plants, or small ferns work great)
- Drill with a small bit (for making drainage holes)
- Glass cutter or pliers (for removing the bulb’s glass casing)
- Twine, string, or thin rope (for hanging the bulbs)
- Soil (if planting in soil)
- Pebbles or small rocks (for drainage, especially if using soil)
- Optional decorations: paint, twine, decorative stones, or moss
Step-by-Step Instructions for Making Hanging Planters with LED Bulbs
Step 1: Remove the Bulb’s Metal Base
- Safety first: Handle the bulb carefully to avoid breaking the glass or cutting yourself on the metal parts.
- Start by using pliers or a screwdriver to gently twist and remove the metal base (the part that connects the bulb to the socket). This step can be a little tricky, but be patient. The metal base should come off with some effort. Be sure to discard it properly, as it’s not recyclable in the same way as the glass bulb.
Step 2: Break the Glass (If Needed)
- Caution: Wear protective gloves to avoid injury from broken glass.
- If you want to expose the interior of the bulb (so you can fill it with soil or plants), use a glass cutter to score the surface, then carefully break the glass. You can also use pliers to crack the glass around the score line.
- Alternatively, you can leave the bulb whole if you prefer to use it for air plants or plants that don’t require soil.
Step 3: Create Drainage Holes (If Using Soil)
- Drainage is key to prevent root rot in plants. Use a drill with a small bit to carefully make a few drainage holes at the bottom of the bulb. This will ensure that excess water can drain out when you water your plants.
- If you decide to skip soil and use air plants, you won’t need to worry about drainage holes, as they don’t need soil to thrive.
Step 4: Add Pebbles or Rocks for Drainage
- Once your bulb is ready, place a layer of pebbles or small rocks at the bottom of the bulb. This will create a drainage layer and allow the water to flow freely, preventing your plant roots from sitting in excess water.
- If you’re not using soil, you can skip this step.
Step 5: Add Soil (If Using Soil)
- If you’re planting a succulent, small fern, or other soil-loving plants, add soil to the bulb. Fill the bulb about halfway with potting mix.
- Lightly pack the soil to ensure it stays in place but don’t compact it too much—roots need room to grow.
- Add more soil if needed, leaving enough space to place the plant inside the bulb.
Step 6: Plant Your Greenery
- Carefully remove your plant from its original pot and gently place it inside the LED bulb.
- For succulents or small plants, make sure the roots are gently tucked in the soil. You can arrange the plant so that the bulb is mostly filled, or leave some space for a decorative touch (like moss or pebbles around the base of the plant).
Step 7: Add Decorations (Optional)
- To add some personal flair, decorate the outside of the LED bulb. You can wrap the bulb with twine or jute rope for a rustic look, or use paint to give it a more colorful vibe.
- For a natural, earthy look, add moss, stones, or sand to the outside or top of the bulb for extra decoration.
Step 8: Create a Hanging Mechanism
- To hang your new plant, use a piece of twine, rope, or string. You’ll need to attach the rope around the neck of the bulb. Tie a knot or use some hot glue to secure the twine to the top of the bulb, creating a loop for hanging.
- If you want a more minimalist look, simply hang the plant by the stem or use metal hooks for a modern touch.
Step 9: Hang Your Bulb Planter
- Find the perfect spot to hang your LED bulb planter. A sunny window sill or balcony railing is a great place, as most plants require plenty of sunlight.
- You can hang the bulbs individually or group them together for a charming display. Experiment with different heights to create visual interest.
Care Tips for Your Hanging LED Bulb Planters
Now that your hanging plant project is complete, here are a few tips on how to care for your new green decor:
- Light: Most plants, especially succulents and air plants, require plenty of indirect sunlight. Place your planters in a spot where they’ll get at least 4-6 hours of light each day.
- Watering: If using soil, water your plants lightly. Be careful not to overwater, as the small container doesn’t have much room for excess moisture. Air plants need to be misted or soaked occasionally.
- Pruning: Keep an eye on your plants and trim any dead or overgrown leaves. This will keep your hanging planters looking neat and vibrant.
Creative Variations: Other DIY Hanging Plant Ideas Using Old LED Bulbs
- Terrarium Bulbs: Turn the bulb into a mini terrarium by filling it with tiny stones, moss, and a small air plant or succulent.
- Fairy Garden: Create a fairy garden inside the LED bulb by adding miniature accessories, moss, and small plants.
- Glass Pendant Planter: For a more sleek and modern look, fill the LED bulb with just a little sand, succulent, and pebbles, and suspend it from a thin wire or chain for a floating, pendant-style display.
Conclusion
Repurposing old LED bulbs into hanging planters is a fun and creative way to add greenery to your home while practicing sustainability. This DIY project allows you to transform simple, discarded objects into charming, functional decor that can brighten up any space. Whether you’re a seasoned gardener or a beginner looking for a creative project, these hanging plant ideas are easy to make and will bring fresh, vibrant life into your home. So, grab your old LED bulbs, some twine, and a few plants, and start crafting your unique hanging planters today!