Grafting is a powerful technique used to propagate plants and create stronger, more productive varieties. When it comes to the banana tree, using a method that involves grafting with banana fruit can yield impressive results. Not only does this technique allow you to propagate banana plants efficiently, but it can also enhance the growth and fruit production of your trees. Here’s how you can use grafting with banana fruit to get amazing results for your garden.
What is Grafting?
Grafting involves joining two plant parts—the rootstock and the scion—in such a way that they grow together and form a single plant. For banana trees, the rootstock is the base of the plant (usually a strong, disease-resistant root), and the scion is the cutting or part of the plant that will develop into the new growth, including the fruit.
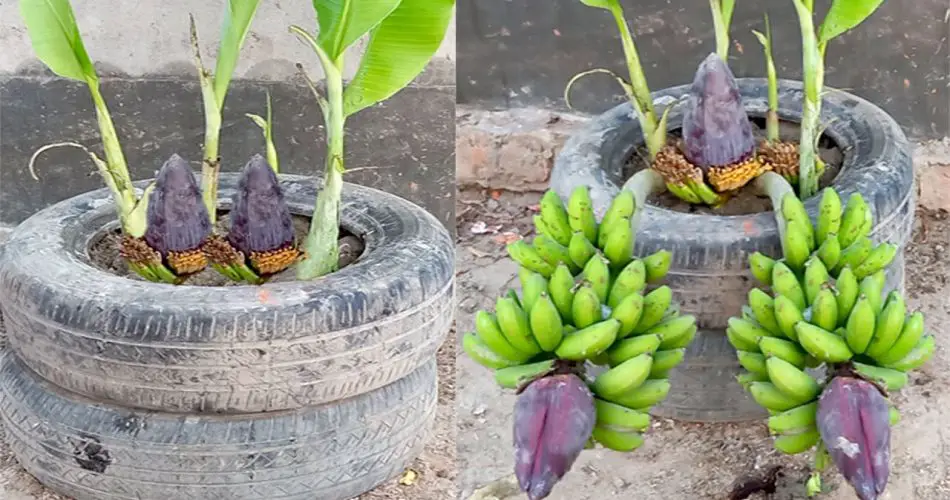
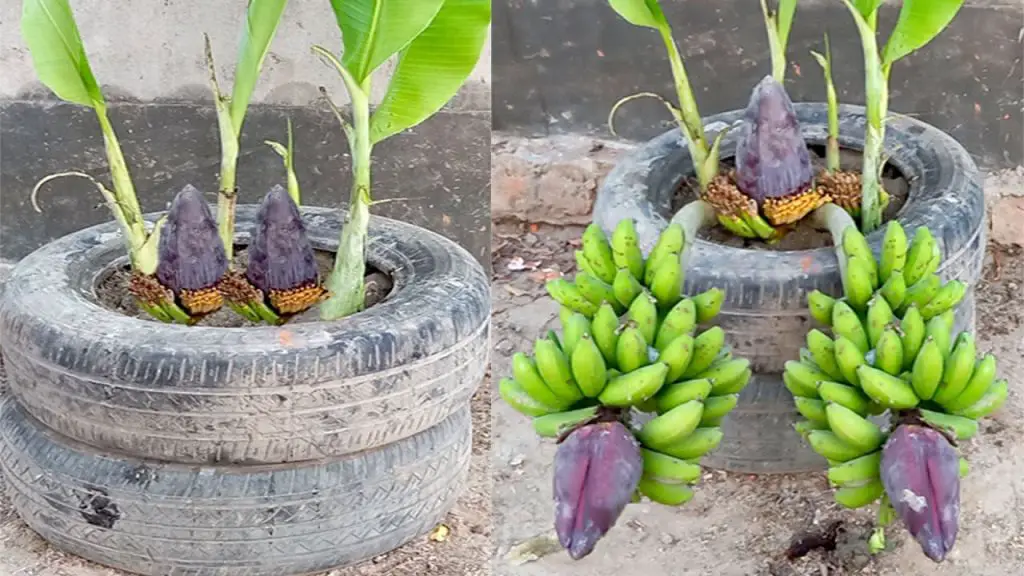
In banana grafting, the most common approach is to use banana fruit itself, or more specifically, parts of the banana plant that will graft successfully to create a productive tree. The use of banana fruit in this technique helps improve fruit yield, disease resistance, and overall plant health.
Techniques for Grafting Banana Trees Using Banana Fruit
There are a few different methods of grafting banana trees using parts of the banana plant, including the use of banana fruit or sections of the banana plant. Here’s a step-by-step guide to some of the most effective techniques:
1. Selecting the Right Banana Plant
Before you begin grafting, you need to select a healthy banana tree from which to obtain your scion. Choose a plant that is free from disease, and make sure it’s at the appropriate stage of growth to produce good grafts. Bananas with strong fruit production and healthy growth habits make the best candidates for grafting.
2. Choosing the Best Grafting Method
There are several grafting methods to choose from, but the most common for banana trees include:
- T-budding: This involves making a small T-shaped incision on the rootstock and placing the scion (a part of the banana fruit or plant) into the incision. The scion will then fuse with the rootstock and begin to grow as one plant.
- Side-Veneer Grafting: In this method, a slanted cut is made on the rootstock, and a similarly angled cut is made on the scion. The scion is then inserted into the cut of the rootstock and secured with grafting tape.
3. Preparing the Graft Site
Before grafting, it’s important to properly prepare both the rootstock and scion. Start by disinfecting all of your tools to avoid transmitting any diseases. For the scion (banana fruit or plant part), you’ll need to remove any excess tissue and ensure the grafting area is smooth and clean. The area on the rootstock should be cleared of any rough spots to ensure the graft will make a strong connection.
4. Grafting with Banana Fruit
For this particular technique, you’ll want to use a banana fruit cutting from a mature banana plant. Here’s how to do it:
- Cut the Fruit: Select a mature banana fruit or the banana plant’s stem and cut it into a manageable piece. This piece will serve as the scion.
- Make a Clean Cut on the Rootstock: Use a sharp knife to make a vertical cut on the rootstock, creating a small opening for the scion to fit into.
- Insert the Scion: Carefully place the banana fruit piece into the incision you made on the rootstock. Ensure that the cambium layers (the greenish part just under the skin of the plant) of both the scion and rootstock align.
- Secure the Graft: Once the scion is positioned properly, wrap the graft with grafting tape to hold everything in place. Make sure the graft is snug but not too tight to avoid damaging the plant.
- Cover the Graft: If you’re working in a dry or windy environment, cover the graft with a plastic bag or wrap to help retain moisture while the graft heals.
5. Caring for the Grafted Banana Tree
After grafting, it’s crucial to give the plant the care it needs to heal and grow. Follow these steps:
- Water Regularly: Keep the grafted plant well-watered, but avoid overwatering. Consistent moisture will encourage the graft to take root, but too much water can lead to rot.
- Maintain Humidity: If the climate is dry, use a humidity dome or cover the plant with plastic to maintain high moisture levels around the graft.
- Remove Grafting Tape: After a few weeks, when the graft has fully healed and started to grow, carefully remove the grafting tape. Be cautious not to damage the new growth as you do so.
- Monitor Growth: Keep an eye on the growth of the grafted banana tree, making sure it’s producing healthy new leaves and fruit. If you notice any signs of disease or pest infestations, address them promptly.
Benefits of Grafting Banana Trees with Banana Fruit
Using banana fruit for grafting offers several benefits:
- Faster Fruit Production: Grafting helps speed up the process of fruit-bearing. You may start seeing bananas sooner than if you were growing a tree from a seed or sucker.
- Improved Disease Resistance: By grafting onto strong, disease-resistant rootstock, the resulting tree is more likely to be immune to common banana diseases.
- Stronger Plants: Grafted banana trees tend to be more robust, with larger fruit bunches and healthier growth overall.
Conclusion
Grafting banana trees using banana fruit is a fascinating and rewarding technique for anyone looking to improve their banana tree’s health and productivity. With the right tools, techniques, and care, you can successfully graft a banana tree that produces abundant, healthy fruit. Whether you’re a seasoned gardener or a beginner, this method will help you create an amazing banana tree that thrives in your garden!


