Rose grafting is a popular method for propagating roses, allowing gardeners to combine the best traits of two different plants into one. Whether you’re a beginner or experienced gardener, mastering the art of rose grafting can help you grow healthier, more vibrant roses. This step-by-step guide will walk you through the process of grafting roses, from selecting the right materials to caring for your newly grafted plant.
Why Choose Rose Grafting?
Grafting offers several advantages over other propagation methods:
- Combining Traits: Grafting allows you to combine the rootstock (the plant’s root system) and the scion (the top part of the plant) to produce a more resilient and fruitful plant.
- Stronger Root System: Using a strong rootstock can make the grafted rose more resistant to diseases, pests, and environmental stresses.
- Faster Results: Grafted roses often grow faster and flower earlier than those grown from cuttings or seeds.
What You’ll Need for Rose Grafting
Before starting, gather the following materials:
- Healthy rose rootstock (a strong, disease-resistant variety)
- Rose scion (a piece of the desired variety you wish to graft onto the rootstock)
- Sharp pruning shears or a grafting knife (for cutting)
- Grafting tape or parafilm (to secure the graft)
- Grafting compound or sealant (to prevent infection and moisture loss)
- A clean surface (such as a cutting board or table)
- Sterile equipment (to ensure your tools are free of pathogens)
Step-by-Step Guide to Rose Grafting
Step 1: Prepare the Rootstock
- Select a healthy rootstock with strong roots and vigorous growth. Rootstock varieties like Dr. Huey or Rosa multiflora are commonly used for grafting roses.
- Prune the rootstock just above the ground level, leaving a sturdy stem of around 6-8 inches tall. Make sure the cut is clean and horizontal to create a smooth surface for grafting.
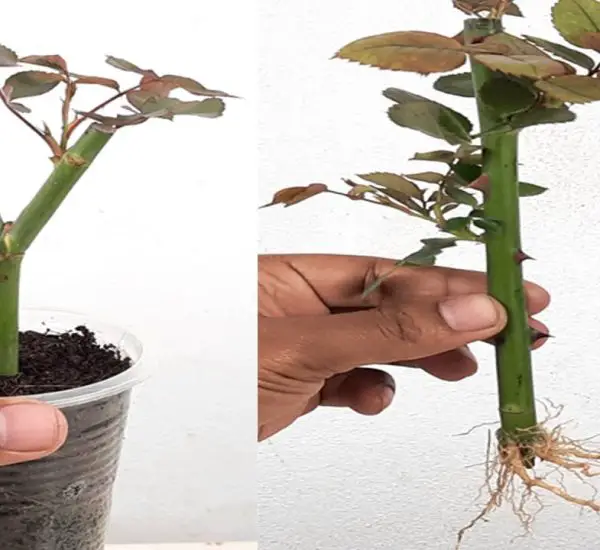
Step 2: Select and Prepare the Scion
- Choose a healthy scion (the variety of rose you want to grow) with several buds. The scion should be taken from the current season’s growth.
- Cut the scion about 4-6 inches long, making sure to include at least one healthy bud. Trim the base of the scion at a 45-degree angle to ensure a good fit when grafting.
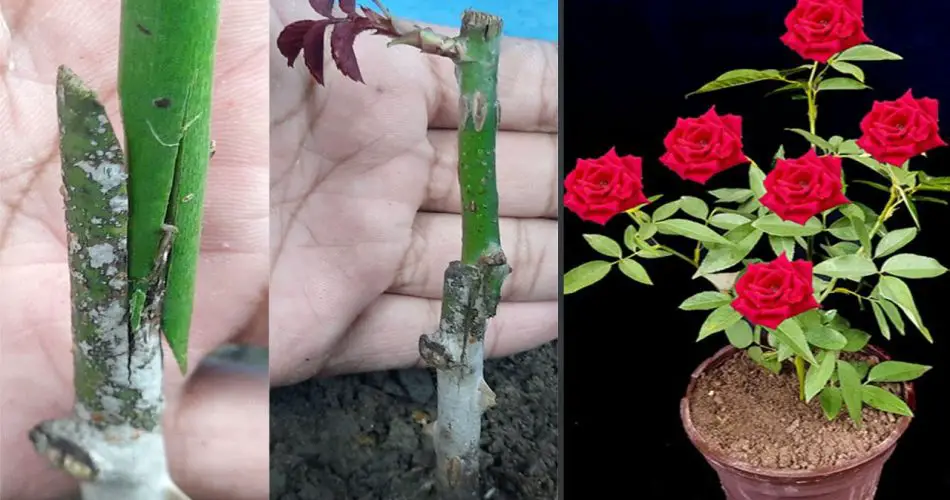
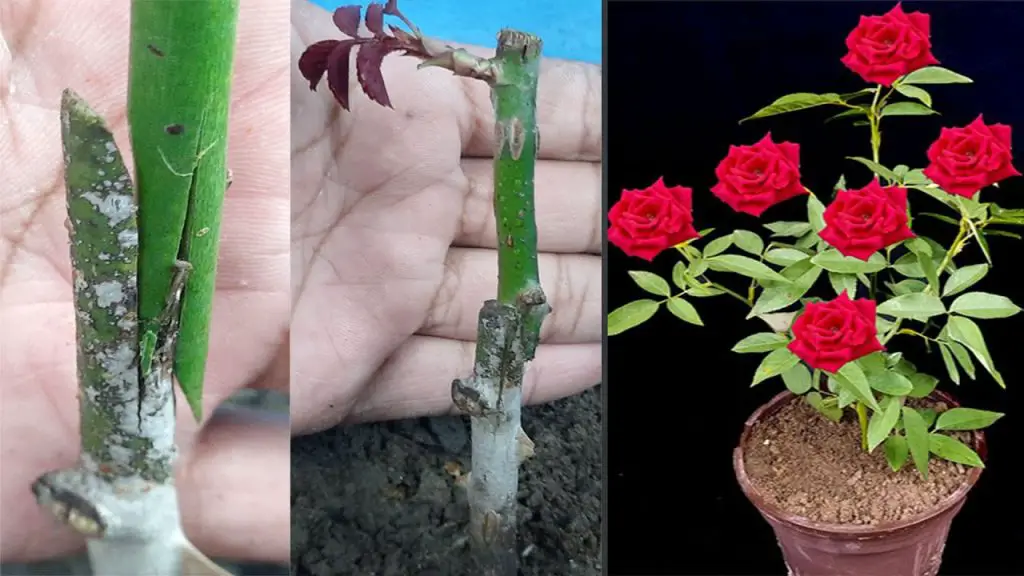
Step 3: Make the Graft
- Make a matching cut on the rootstock. There are different grafting techniques, but the most common for roses is the whip and tongue graft. Here’s how:
- Cut the rootstock at a sharp angle (about 45 degrees).
- Cut the scion at a matching angle, making sure the cambium layers (the green tissue just under the bark) of both the rootstock and scion will align when placed together.
- Make a tongue cut on both the rootstock and scion. This is a small vertical cut that allows the two parts to fit together snugly.
Step 4: Join the Rootstock and Scion
- Align the cambium layers of the rootstock and scion. These layers must touch for the graft to be successful.
- Carefully press the scion onto the rootstock, ensuring a secure fit. The cambium layers should line up perfectly.
Step 5: Secure the Graft
- Wrap the graft tightly with grafting tape or parafilm to hold the scion and rootstock together. This helps prevent moisture loss and keeps the graft in place.
- Make sure the graft site is tightly sealed, but not so tight that it cuts off circulation.
Step 6: Seal the Graft
- Apply a grafting compound or sealant to the graft to prevent infection and protect it from drying out. This also helps to maintain the moisture balance for the graft.
Step 7: Caring for the Grafted Rose
- Place the grafted rose in a warm, sheltered location with indirect sunlight. It’s essential to keep the grafted area moist but not waterlogged.
- Monitor the graft regularly. Once you see new growth emerging from the scion, it’s a sign that the graft has taken and the plant is growing successfully.
- After the graft takes, remove the grafting tape carefully to allow the plant to grow freely. You can also prune back the rootstock if it starts to outgrow the scion.
Common Grafting Techniques for Roses
While the whip and tongue graft is the most popular, other techniques can be used, such as:
- Cleft grafting: This involves splitting the rootstock and inserting the scion into the split.
- Budding: A bud from the scion is inserted into a T-shaped cut on the rootstock, and the bud is allowed to grow into the plant.
Each grafting method has its benefits, but the whip and tongue is often preferred for its simplicity and effectiveness.
Tips for Successful Rose Grafting
- Choose a healthy rootstock and scion: The health of both the rootstock and scion is crucial to a successful graft.
- Keep the graft clean: Sterilize your tools to prevent contamination and infection.
- Graft at the right time: Spring is the best time for grafting, as the rootstock and scion will both be in their active growing phases.
- Ensure good alignment: The cambium layers must line up perfectly to ensure a strong graft bond.
- Provide care and patience: Grafting can take several weeks to months for the graft to take hold, so be patient and keep your plant well-watered and cared for.
Conclusion
Rose grafting is a simple and effective technique for propagating roses, combining the strengths of both the rootstock and scion to create a healthy, robust plant. By following this step-by-step guide and using the proper tools and care, you’ll be able to successfully graft roses and enjoy vibrant blooms in your garden. Whether you’re propagating a favorite variety or trying to grow a more resilient rose, grafting is a rewarding way to expand your rose garden. Happy grafting! 🌹