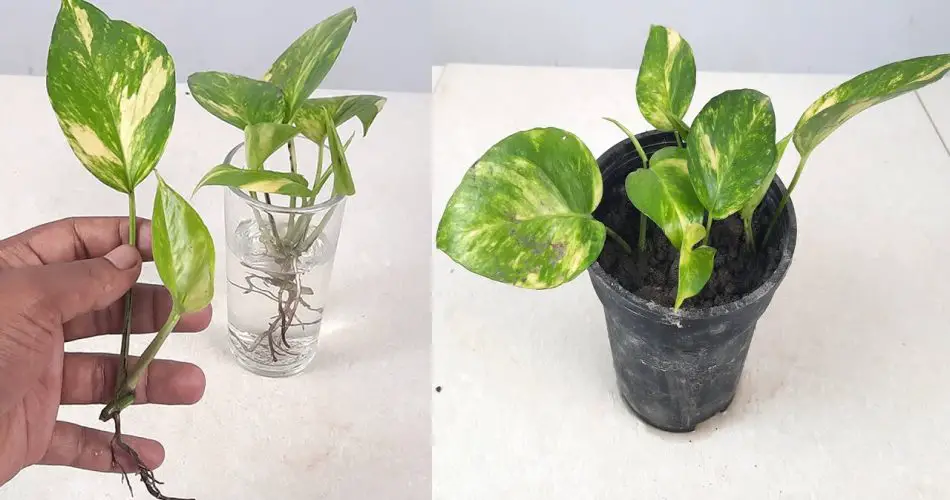
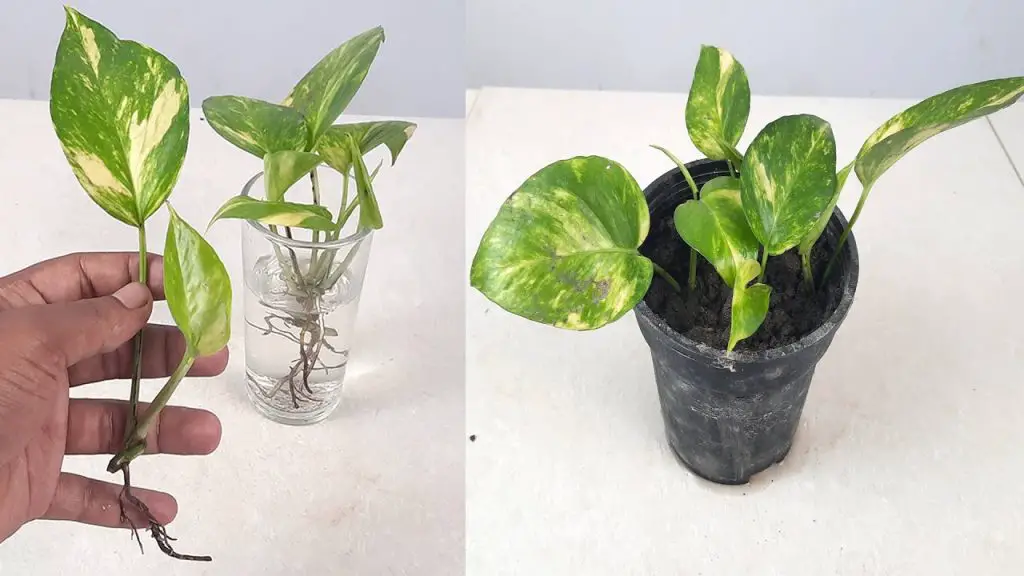
Transplanting water-rooted cuttings into soil is a crucial step in ensuring that your plant cuttings continue to grow and thrive. Moving plants from water to soil isn’t as simple as just planting them into the ground—it’s important to follow a few steps to make the transition smoother and increase the chances of success. Here’s a guide on how to properly move your cuttings from water to soil and give your new plant babies the best chance to flourish.
1. Choose the Right Time for Transplanting
Before you transplant your water-rooted cuttings into soil, you should make sure they have developed a healthy root system. Ideally, the roots should be at least 1-2 inches long. Longer roots will have a better chance of establishing themselves quickly once planted in soil.
2. Prepare the Soil
The next step is to prepare the soil for your cuttings. Choose a well-draining potting mix or a soilless mix that will allow water to flow freely, preventing the roots from sitting in water for too long, which can cause rot. If you are planting multiple cuttings, consider using a container or small pots with drainage holes.
3. Transitioning from Water to Soil
When your cutting has developed strong roots in water, gently remove the cutting from the water. Be cautious not to damage the roots during this process. Soil acclimatization is essential—be sure to plant the cutting gently into the prepared potting mix, covering the roots fully while leaving the stem exposed. This helps protect the roots while they adjust to their new environment.
4. Watering After Transplanting
Once transplanted, water the cutting thoroughly to help settle the soil around the roots. However, avoid overwatering—while the cutting is still establishing itself in the soil, it’s important to keep the soil slightly moist but not soggy. Light misting can also help to create humidity, which is beneficial for young plants.
5. Place in Indirect Light
To help the cutting adapt, place it in a location that offers indirect sunlight. Direct sun can stress the plant and hinder root establishment. Once the roots have started growing into the soil and the plant looks healthy, you can gradually expose it to more direct sunlight.
6. Monitor Growth
It’s important to keep a close eye on your newly transplanted cutting during the first few weeks. Look for signs of new growth and ensure the plant isn’t wilting or showing signs of stress. You may also notice some leaf drop initially, but this is often a normal part of the adaptation process. Regularly check the soil’s moisture level and continue with light watering.
7. Transplanting to Larger Pots or Outdoors
Once your plant has adjusted to its new environment and the roots have become established in the soil, it may be time to transplant it into a larger pot or even outdoors, depending on the type of plant. This will give the plant more room to grow and flourish.
Key Takeaways
- Ensure the roots are developed before transplanting.
- Use a well-draining soil mix to avoid root rot.
- Water properly after transplanting, but avoid overwatering.
- Place in indirect light to reduce transplant shock.
- Monitor the plant’s progress and provide extra care during the transition.
Transplanting water-rooted cuttings into soil is a simple process if you follow the right steps. By providing the right environment and care, you can ensure that your plants will continue to grow healthily and eventually thrive in their new soil home.


