
Creating your own cement pots is a fantastic way to add a personal touch to your garden or indoor space. Not only are these pots durable and stylish, but they can also be customized to fit your aesthetic. Here’s a step-by-step guide to making beautiful cement pots at home!
Materials Needed
- Cement mix (available at hardware stores)
- Water
- Mixing container (bucket or wheelbarrow)
- Mold (you can use plastic containers, bowls, or even silicone molds)
- Stirring tool (a stick or shovel)
- Gloves (to protect your hands)
- Plastic sheet (to cover your workspace)
- Sealer (optional, for a finished look)
Step-by-Step Instructions
1. Prepare Your Workspace
- Cover the Area: Lay down a plastic sheet to protect your work surface from spills and messes.
- Gather Materials: Have all your materials within reach for easy access.
2. Mix the Cement
- Combine Ingredients: In your mixing container, combine the cement mix and water. The typical ratio is about 3 parts cement to 1 part water.
- Stir Well: Use your stirring tool to mix until you achieve a smooth, thick consistency similar to pancake batter. Avoid lumps for a polished finish.
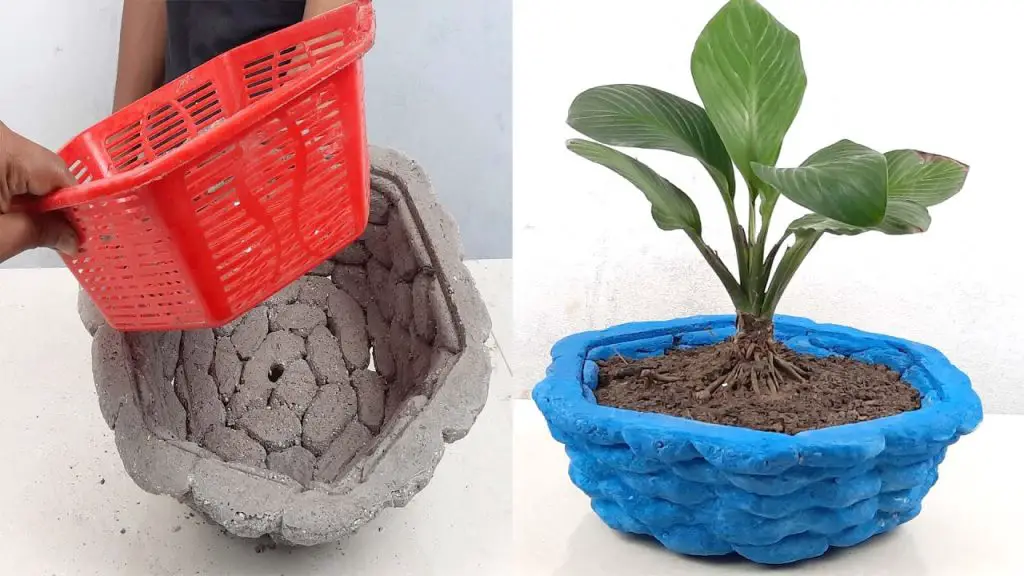
3. Prepare the Mold
- Choose a Mold: Select a mold that fits your desired pot size and shape. If you want a more decorative look, consider using silicone molds for intricate designs.
- Grease the Mold: Lightly coat the inside of the mold with cooking oil or a release agent to ensure easy removal later.
4. Pour the Cement
- Fill the Mold: Carefully pour the mixed cement into the mold. Fill it to the desired height, leaving some space at the top for a smooth finish.
- Tap the Mold: Gently tap the sides of the mold to release any air bubbles that may have formed. This helps create a solid, even pot.
5. Create a Drainage Hole (Optional)
- Insert a Small Object: If you want drainage, take a small object (like a stick or a plastic straw) and insert it vertically into the cement before it sets. This will create a hole for excess water to escape.
6. Let It Cure
- Cover the Mold: Cover your mold with a plastic sheet to retain moisture. This will help the cement cure properly.
- Curing Time: Allow the cement to cure for at least 24-48 hours. The longer you let it sit, the stronger it will be.
7. Demold the Pot
- Remove Carefully: After curing, gently pull the mold away from the cement pot. If you used a rigid mold, you might need to tap it lightly to loosen the pot.
- Smooth Edges: Use sandpaper to smooth out any rough edges or imperfections.
8. Finish Your Pot
- Sealing (Optional): If you want to protect the pot and enhance its appearance, apply a sealer once the pot is completely dry.
- Paint or Decorate: Get creative! You can paint the pot, add decorative elements, or leave it in its natural concrete state for a minimalist look.
9. Planting in Your New Pot
- Add Soil: Fill the pot with potting soil and plant your favorite flowers or succulents.
- Care Tips: Ensure your plants receive adequate sunlight and water, and enjoy your beautiful new pots!
Conclusion
Making your own cement pots is not only a fun DIY project but also a great way to showcase your plants in style. With just a few materials and some creativity, you can create stunning pots that enhance any space. Start your DIY journey today and enjoy the satisfaction of growing your plants in pots you crafted yourself!
Show Comments


