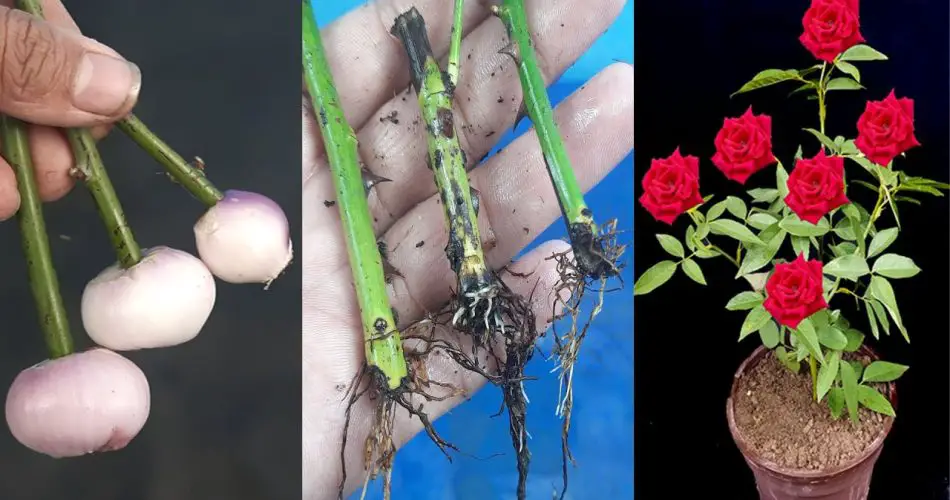
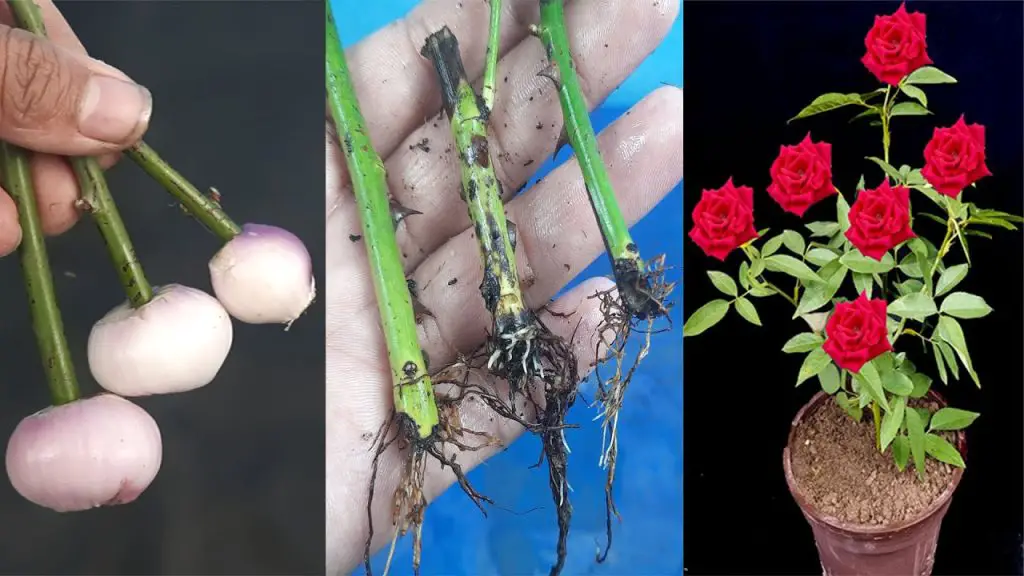
If you want to grow roses from cuttings but are looking for an unconventional and natural way to propagate them, then growing rose plant cuttings in an onion is a surprisingly effective method! This technique is easy to implement, requires minimal resources, and can lead to strong and healthy rose plants. Onions have natural properties that help encourage root development, making them an ideal medium for growing rose cuttings.
In this article, we’ll guide you through the process of growing rose cuttings in an onion, step by step.
Why Use an Onion to Propagate Rose Cuttings?
Onions are not just a kitchen staple; they also contain powerful properties that can help promote rooting in rose cuttings:
- Natural antibacterial properties: Onions help protect the rose cutting from bacteria and fungi, which can often be a threat to new plants.
- Moisture retention: The onion helps maintain a high level of moisture around the cutting, which is essential for root development.
- Nutrient-rich environment: Onions provide a natural environment for cuttings to thrive by slowly releasing nutrients as they decompose.
- Easy to use: Onions are a cheap and easily available option for those who want to try a simple yet effective rooting method.
Materials You’ll Need:
- Fresh Rose Cuttings (about 6-8 inches long)
- One Onion (large enough to hold the cutting)
- Sharp knife or scissors
- Water
- A small pot or container
- Plastic bag or a humidity dome (optional)
Step-by-Step Guide to Grow Rose Cuttings in an Onion
Step 1: Select and Prepare Your Rose Cuttings
- Choose healthy rose stems: Select a healthy rose plant with fresh, firm stems. Cut a 6-8 inch long stem that includes at least one leaf node (the part of the stem where leaves grow).
- Make the cut: Use sharp scissors or a knife to make a diagonal cut just below the leaf node. Make sure the cutting is clean and free from disease or damage.
Step 2: Prepare the Onion
- Peel the onion: Take a large onion and peel off the outer layers until you are left with a smooth bulb.
- Cut a small hole: Use a sharp knife to carefully create a hole in the onion large enough to insert the rose cutting. Make sure the hole is deep enough so the cutting stays upright inside the onion.
- Optional: If the onion is too large, you can cut it in half or use multiple onions, depending on how many rose cuttings you have.
Step 3: Insert the Rose Cutting into the Onion
- Insert the cutting into the hole: Gently place the bottom end of the rose cutting into the hole you created in the onion. Ensure that the cutting is stable and upright.
- Ensure proper depth: The cutting should go into the onion deep enough to stay secure, but not so deep that it touches the base of the onion completely. You want to make sure there’s enough space for the cutting to root.
Step 4: Place the Onion in Water
- Put the onion in a small pot or container: After inserting the rose cutting into the onion, place the whole setup in a container with a small amount of water at the bottom. The onion itself will help keep the cutting moist and encourage rooting.
- Ensure the cutting stays hydrated: Make sure that the onion stays moist throughout the rooting process by occasionally topping up the water.
Step 5: Create a Humid Environment (Optional)
- To maintain a high humidity around the cutting and encourage root growth, cover the setup with a plastic bag or place it under a humidity dome. This will help retain moisture and provide the ideal environment for the cutting to root.
Step 6: Place in a Warm, Bright Area
- Choose a warm location: Place the onion with the cutting in a warm area with indirect sunlight. The ideal temperature for rose cuttings to root is around 65-75°F (18-24°C). Avoid placing it in direct sunlight, as this can dry out the cutting.
- Be patient: It may take a few weeks for the cutting to develop roots. During this time, make sure to keep the environment humid and check the onion and cutting regularly to ensure they remain healthy.
Step 7: Monitor Root Development
- After about 2 to 3 weeks, you should start to see roots developing at the base of the cutting. At this point, you can gently tug on the cutting to feel for resistance, which indicates that roots are forming.
- Remove the plastic cover: Once you see the roots, you can remove the plastic bag or humidity dome and allow the plant to acclimate to normal indoor conditions.
Step 8: Transplant the Cutting
- Once the rose cutting has established a healthy root system, it’s time to transplant it into a small pot with well-draining soil. Make a hole in the soil and carefully place the rooted cutting in it.
- Water the plant thoroughly after transplanting and continue to care for it as a normal rose plant.
Tips for Success
- Choose a healthy, disease-free cutting to ensure the best chance of successful rooting.
- Don’t overwater the onion or the cutting, as too much moisture can cause the cutting to rot.
- If you’re using multiple onions, you can experiment with different types of roses to see which ones root the best.
- Be patient—rose cuttings can take some time to root, but once they do, they will grow into strong, healthy plants.
Conclusion
Growing rose cuttings in an onion is an easy and effective method for propagating roses at home. The onion’s natural properties help maintain moisture, protect against diseases, and provide a nutrient-rich environment for your cuttings. By following these simple steps, you can create beautiful, healthy rose plants from cuttings in no time. Happy gardening! 🌹


