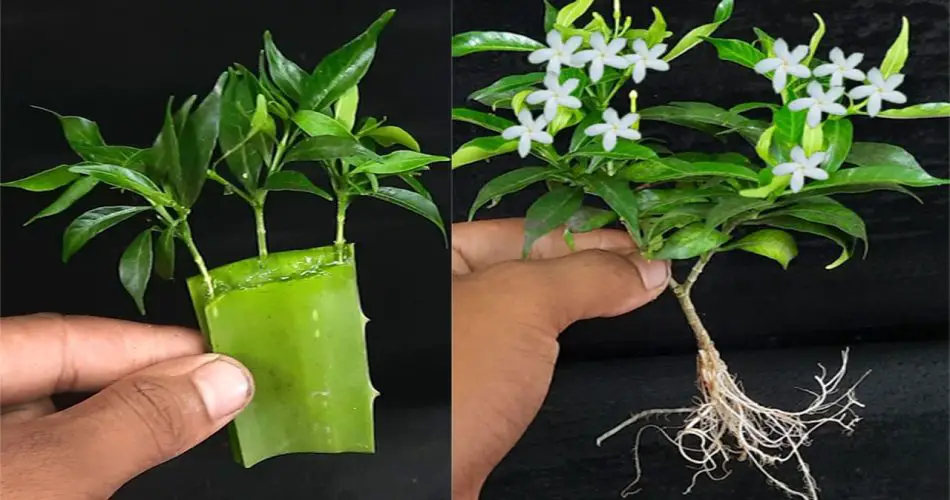
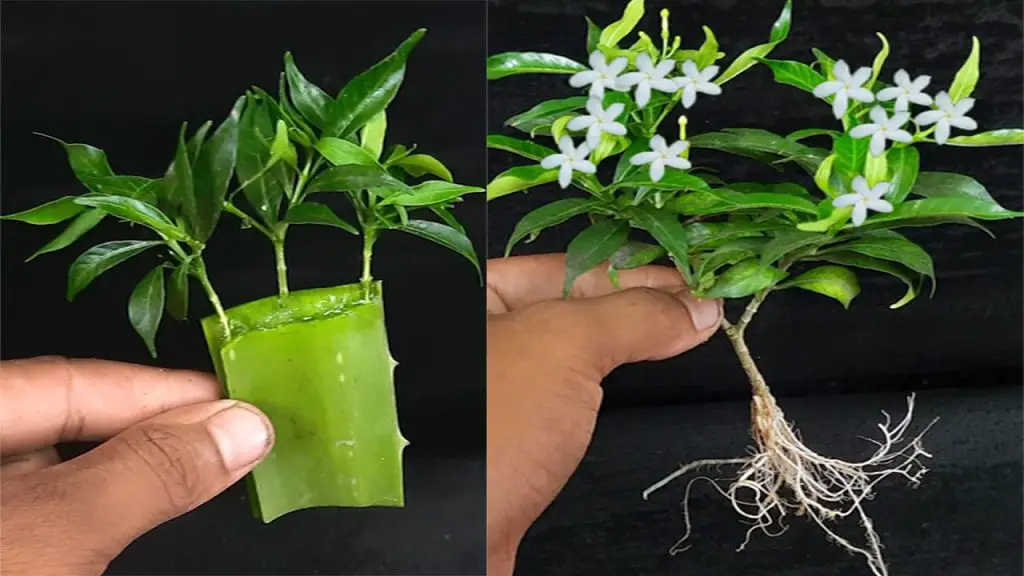
Mini Tagar, also known as Tagetes minuta or Marigold, is a vibrant flowering plant that can brighten up any garden. Growing Mini Tagar from cuttings is a simple and effective method to propagate this plant. By using sand as the growing medium, you can ensure that the cutting has proper drainage, which promotes healthy root development. In this guide, we’ll show you how to grow Mini Tagar from cuttings using sand.
Why Grow Mini Tagar from Cuttings?
- Fast growth: Cuttings root relatively quickly, allowing you to grow multiple plants in a short amount of time.
- Clone your favorite plants: Growing from cuttings ensures the new plant has the same characteristics as the parent plant, such as flower color and size.
- Minimal cost: Growing Mini Tagar from cuttings is an affordable way to expand your garden without the need to buy new plants.
Materials Needed:
- Mini Tagar Cutting: A healthy stem from a mature Mini Tagar plant.
- Sharp Knife or Scissors: To cut the stem cleanly.
- Sand: Coarse, well-draining sand works best.
- Small Pot or Tray: For planting the cuttings.
- Rooting Hormone (optional): To encourage faster root growth (optional but beneficial).
- Water: For moistening the sand.
- Plastic Wrap or Clear Plastic Bag: To create a humid environment.
- Spray Bottle: To mist the cuttings and maintain humidity.
Step-by-Step Guide: How to Grow Mini Tagar from Cutting in Sand
Step 1: Prepare the Cutting
- Select a healthy cutting: Choose a healthy, non-flowering Mini Tagar plant. The cutting should be taken from a mature plant, ideally during the spring or early summer when the plant is actively growing.
- Take a cutting: Using a sharp knife or scissors, cut a 6-8 inch section of stem. The cutting should be just below a leaf node (the bump where leaves emerge). Make sure the cutting is free from disease and pests.
- Remove lower leaves: Trim any leaves from the bottom half of the cutting to expose the node. Leave a few leaves at the top of the cutting.
Step 2: Prepare the Sand Medium
- Choose the right sand: Use coarse, well-draining sand for best results. Avoid using fine sand, as it may become compacted and hinder root growth. You can use a mix of sand and perlite for better aeration.
- Fill a pot or tray with sand: Fill a small pot or tray with sand up to a few inches deep. Ensure that the sand is moist but not soaking wet. Mist it lightly with a spray bottle if needed to maintain the right moisture level.
Step 3: Apply Rooting Hormone (Optional)
- Dip the cutting: If you’re using rooting hormone, dip the cut end of the Mini Tagar cutting into the hormone powder. Gently tap off any excess. This step is optional but can help speed up the rooting process.
Step 4: Insert the Cutting into the Sand
- Make a hole in the sand: Use a pencil or stick to make a small hole in the sand where you will insert the cutting. The hole should be deep enough to hold the cutting securely.
- Place the cutting: Insert the bottom end of the cutting into the hole, burying it about 2-3 inches deep. Gently firm the sand around the base to hold it in place.
Step 5: Create a Humid Environment
- Cover the cutting: To maintain a humid environment around the cutting, cover the pot or tray with a clear plastic bag or plastic wrap. This will trap moisture and create a greenhouse effect, which is important for root development.
- Ensure ventilation: Make small holes in the plastic to allow for air circulation. You can also open the plastic bag periodically to prevent mold or excessive moisture buildup.
Step 6: Place in Indirect Sunlight
- Choose a warm location: Place the pot or tray in a location with bright, indirect sunlight. Avoid direct sunlight, which can overheat the cutting and dry it out.
- Maintain the temperature: Mini Tagar cuttings thrive in temperatures between 65°F to 75°F (18°C to 24°C). Ensure that the cutting is kept in a warm spot but not in a drafty or overly hot area.
Step 7: Water and Maintain the Cutting
- Mist regularly: Keep the sand lightly moist by spraying it with water every few days. Be sure not to overwater, as this can lead to rot.
- Monitor humidity: Check the plastic cover regularly to ensure there is enough moisture inside. If necessary, adjust the cover to maintain a humid environment.
Step 8: Check for Root Growth
- Wait for root development: After about 3-4 weeks, gently tug on the cutting to see if it resists. If it does, this indicates that roots have formed.
- Remove the plastic cover: Once you see strong roots, you can gradually remove the plastic cover. Start by removing it for short periods and increase the ventilation time until the cutting is acclimated to the open air.
Step 9: Transplant the Cutting
- Prepare a larger pot: Once the cutting has developed strong roots and healthy new growth, it’s time to transplant it into a larger pot filled with well-draining potting soil.
- Transplant the cutting: Carefully remove the rooted cutting from the sand and plant it into the larger pot. Water it well and place it in a spot with indirect sunlight to continue growing.
Additional Tips for Success
- Temperature: Keep the cuttings in a warm, humid environment to promote quicker rooting. A temperature range of 65°F to 75°F (18°C to 24°C) is ideal.
- Avoid direct sunlight: Direct sunlight can scorch the cutting and cause it to dry out. Keep the cutting in a bright, indirect light for best results.
- Be patient: Rooting can take a few weeks, so be patient and allow the cutting time to establish roots before transplanting it into the garden.
Conclusion
Growing Mini Tagar from cuttings in sand is an easy and effective method of propagation that allows you to quickly multiply your plants. The use of sand ensures excellent drainage, preventing waterlogging and promoting healthy root development. With proper care and patience, you can successfully propagate Mini Tagar and enjoy the beauty of these vibrant flowers in your garden or home. Happy gardening!


