Grafting is a highly effective method to propagate a guava tree and is commonly used by both home gardeners and commercial growers. This technique involves joining a scion (a cutting from a mature guava tree) with a rootstock (the root system of another guava or compatible tree), allowing the two to grow together as one plant. When done correctly, grafting results in a tree that produces high-quality fruit and has the desired characteristics of the parent plant. In this article, we will explore the best way to graft a guava tree and the most effective method for ensuring success.
1. Why Graft a Guava Tree?
Grafting is an ideal method for propagating guava trees because it allows you to:
- Preserve genetic traits: Grafting ensures that the new tree will have the same fruit quality and growth habits as the parent tree.
- Faster fruiting: A grafted tree often fruits earlier than one grown from seed, allowing for a quicker harvest.
- Disease resistance: Using a disease-resistant rootstock can help create a guava tree that is more robust and better able to withstand pests and diseases.
- Improved growth: Grafting can help improve the overall health and vigor of the tree.
2. Choosing the Right Scion and Rootstock
The first step in grafting a guava tree is to select both the scion and rootstock. Here’s how to choose the best materials:
Scion Selection:
- Choose a healthy, disease-free guava branch from a mature tree.
- The scion should be about 6 to 8 inches long and have at least 2 to 3 buds.
- The scion should come from a tree that has the desired characteristics, such as a specific fruit variety, size, or flavor.
Rootstock Selection:
- Select a young guava tree or a compatible rootstock with a healthy root system.
- The rootstock should be robust and free of pests or diseases.
- Ideally, choose a rootstock that is compatible with the scion variety. Guava trees of the same species generally work best for grafting.
3. Preparing the Scion and Rootstock
Before beginning the grafting process, you need to properly prepare both the scion and rootstock:
Preparing the Scion:
- Cut the scion just below a healthy bud using a sharp, sterile knife or pruning shears.
- Remove any excess leaves or branches from the scion, leaving just the cut end and a few buds.
- If using a grafting hormone, dip the cut end of the scion into it to encourage rooting.
Preparing the Rootstock:
- Cut the rootstock to a suitable height, typically about 6 to 8 inches from the soil level.
- Make a clean, straight cut at the top of the rootstock where the scion will be attached.
- Ensure the rootstock is freshly cut to avoid infection and drying out during the grafting process.
4. The Grafting Process
There are several methods of grafting, but the cleft graft and tongue graft are the most common and effective methods for guava trees. Below, we will discuss the cleft graft method, which is simple and works well for guava trees.
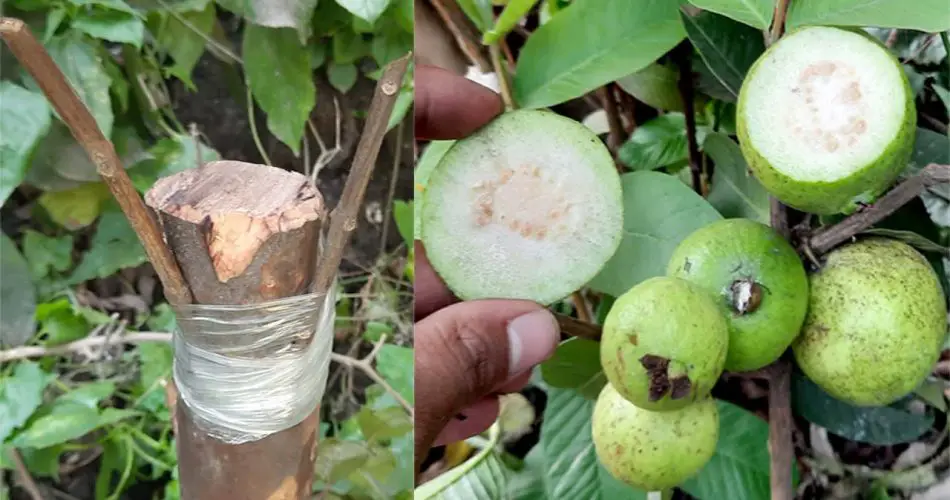
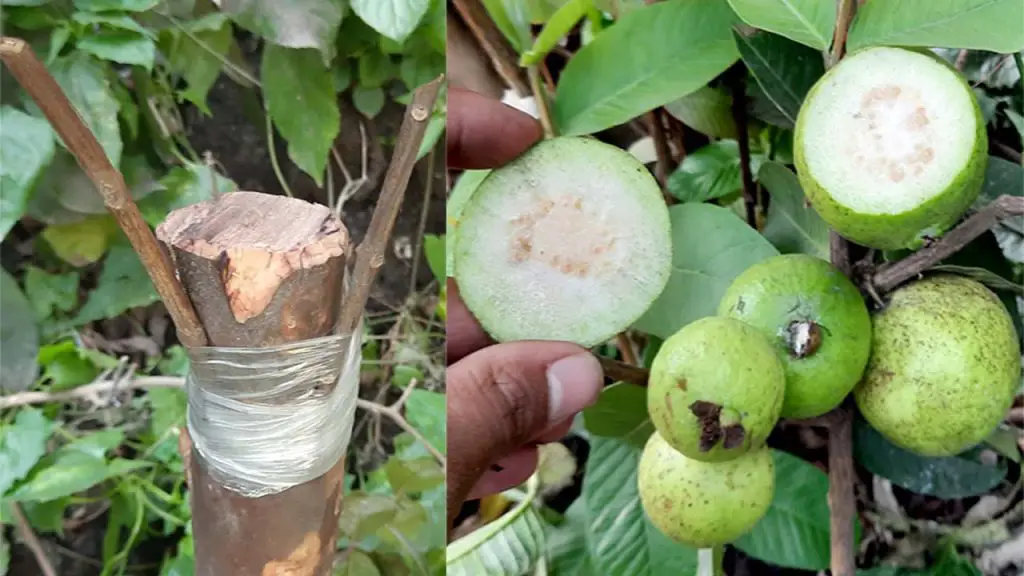
Cleft Grafting:
- Make a Vertical Cut: On the rootstock, make a vertical cut about 2 inches deep.
- Prepare the Scion: Cut the base of the scion into a wedge shape. This will allow the scion to fit snugly into the rootstock.
- Insert the Scion: Place the wedge-shaped scion into the vertical slit of the rootstock. Ensure that the cambium layers (the green layer just beneath the bark) of both the scion and rootstock are aligned.
- Secure the Graft: Use grafting tape or a grafting clip to secure the scion to the rootstock. Make sure the grafted area is tightly bound but not overly tight, as the tree will need space to grow.
- Seal the Graft: Cover the grafted area with grafting wax or tape to prevent moisture loss and infection.
5. Post-Grafting Care
Once the graft is complete, it is important to provide proper care to ensure that the grafted guava tree grows successfully:
- Watering: Keep the grafted tree in a humid environment. Water the tree regularly to keep the soil moist but not waterlogged. Avoid overwatering, as it can lead to root rot.
- Temperature: Keep the grafted tree in a warm spot with indirect sunlight. Ideal temperatures for grafting are between 70-85°F (21-29°C).
- Humidity: To maintain high humidity, cover the grafted area with a plastic bag or create a small greenhouse around the tree. This will help prevent the graft from drying out.
- Monitoring: Check the graft regularly for signs of healing. After 2-3 weeks, the scion should start to grow and show signs of new shoots. Once you see growth, remove the plastic cover gradually to allow the plant to adjust to normal environmental conditions.
6. When to Remove Grafting Tape
After about 4-6 weeks, the graft should be fully healed. At this point, you can carefully remove the grafting tape or other securing materials. It is important to leave the grafted area intact until the plant has fully bonded and established.
7. Transplanting the Grafted Guava Tree
Once the graft has successfully healed and the plant has started to grow, it can be transplanted into the garden or a larger pot. Choose a location with full sun and well-draining soil. Ensure that the tree has enough space to grow and produce fruit.
8. Benefits of Grafting Guava Trees
- Faster fruit production: Grafted guava trees tend to fruit earlier than those grown from seed.
- Disease resistance: Using a disease-resistant rootstock can help the tree thrive even in challenging environments.
- Consistency: Grafting ensures that the new tree will produce the same quality fruit as the parent tree.
Conclusion
Grafting is the most effective way to propagate a guava tree and achieve desirable characteristics, such as early fruiting and high-quality fruit. By selecting the right scion and rootstock, preparing them properly, and using the cleft grafting method, you can ensure a successful graft. With proper post-grafting care and patience, your grafted guava tree will grow into a healthy, productive plant, providing you with delicious guavas for years to come.


